Flour, water, salt and time
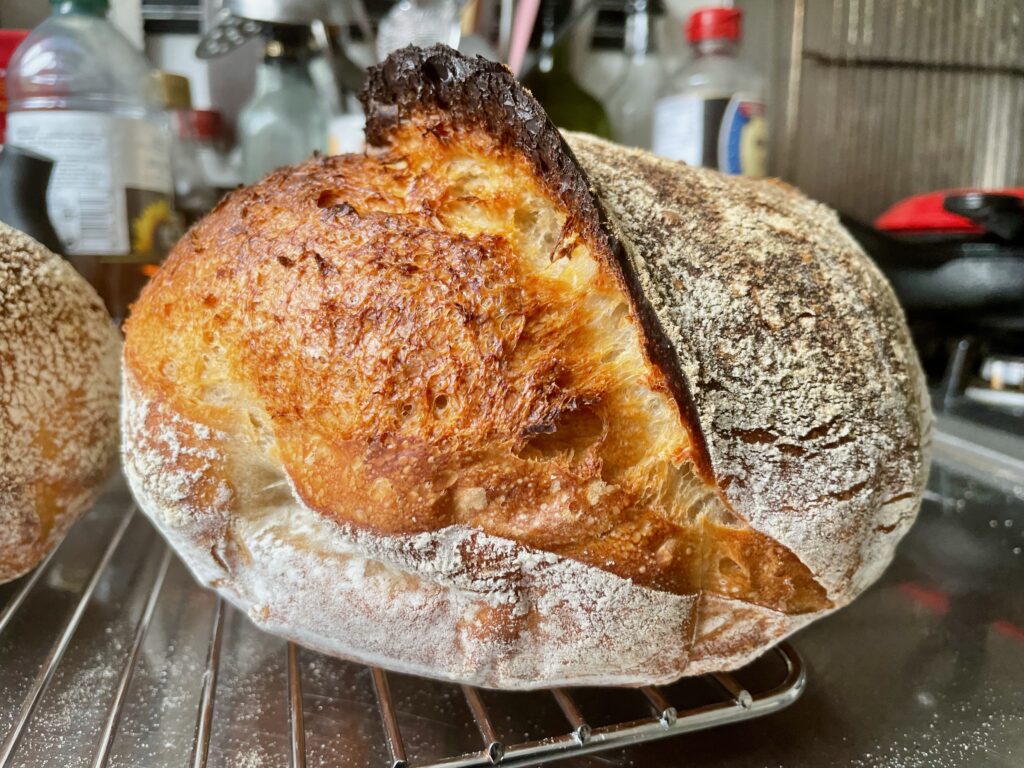
This is my standard sourdough recipe which I make every week. It is a high hydration loaf (meaning it has a lot of water in) which has an elastic crumb with holes of all sizes and an amazingly crunchy crust. The level of hydration means the loaf will last for five or more days – on days one and two it is perfect just sliced with butter, from day three onwards it toasts beautifully (topped with marmalade) and makes the best grilled cheese sandwich.
You will need a cast iron casserole with a tight fitting lid such as a Le Creuset to cook the bread in. I’ve given the quantities for a two different casserole sizes and one or two loaves.
To make the most of the oven heat I make two loaves at once, and would encourage doubling up if your oven is big enough and you have two dishes. I usually make one small and one large loaf at the same in my typical single domestic oven.
You will also need round bannaton baskets to prove the loaves in, if you don’t have these a sieve or colander lined with a clean tea towel will work too.
This bread needs a long, slow prove to develop its amazing flavour and texture. The timings start on the evening of day one and you bake the loaves on the morning of day three. Whilst it takes quite a long time there is not very much actual hands on work, and day two fits well into a day when you are at home and busy with other things. The long ferment time also means you do need very strong flour – normal bread flour will breakdown too much.
I like to add some dark rye flour alongside the white flour, if you cannot get this then some strong wholemeal works well.
The quantity of water and length of fermentation time needed to make this bread helps develop its gluten and it does not need any kneading by hand or machine, but it does require some unusual processes which if you are new too can take a few tries to master. I have made a videos below of the techniques I have developed which show my approach.
Before you start follow this post to create and care for your sourdough starter.
For sourdough bread you will need…
The table below shows quantities depending on the casseroles you have for cooking the final loaves in – they are medium 20cm/8″ and large 26cm/10″ circular dishes
Quantities for the following casseroles
| 1x20cm | 1x26cm | 2x20cm | 1x20cm + 1x26cm | |
| Very strong white bread flour | 340g | 510g | 680g | 850g |
| Dark rye flour | 60g | 90g | 120g | 150g |
| Cold water | 320g | 480g | 640g | 800g |
| Sourdough starter | 65g | 95g | 130g | 160g |
| Salt | 8g | 12g | 16g | 20g |
| Bannaton | 1xMid | 1xLarge | 2xMid | 1xLarge +1xMid |
In addition you will need
- Large bowl
- Clean tea towel
- Plastic bowl scraper
- Metal bench scraper
- Strong white bread flour
- Rice flour
- Bread lame / very sharp knife
- Baking paper (or circular non-stick silicon sheets for bread making)
- Cooling rack
To make delicious sourdough…
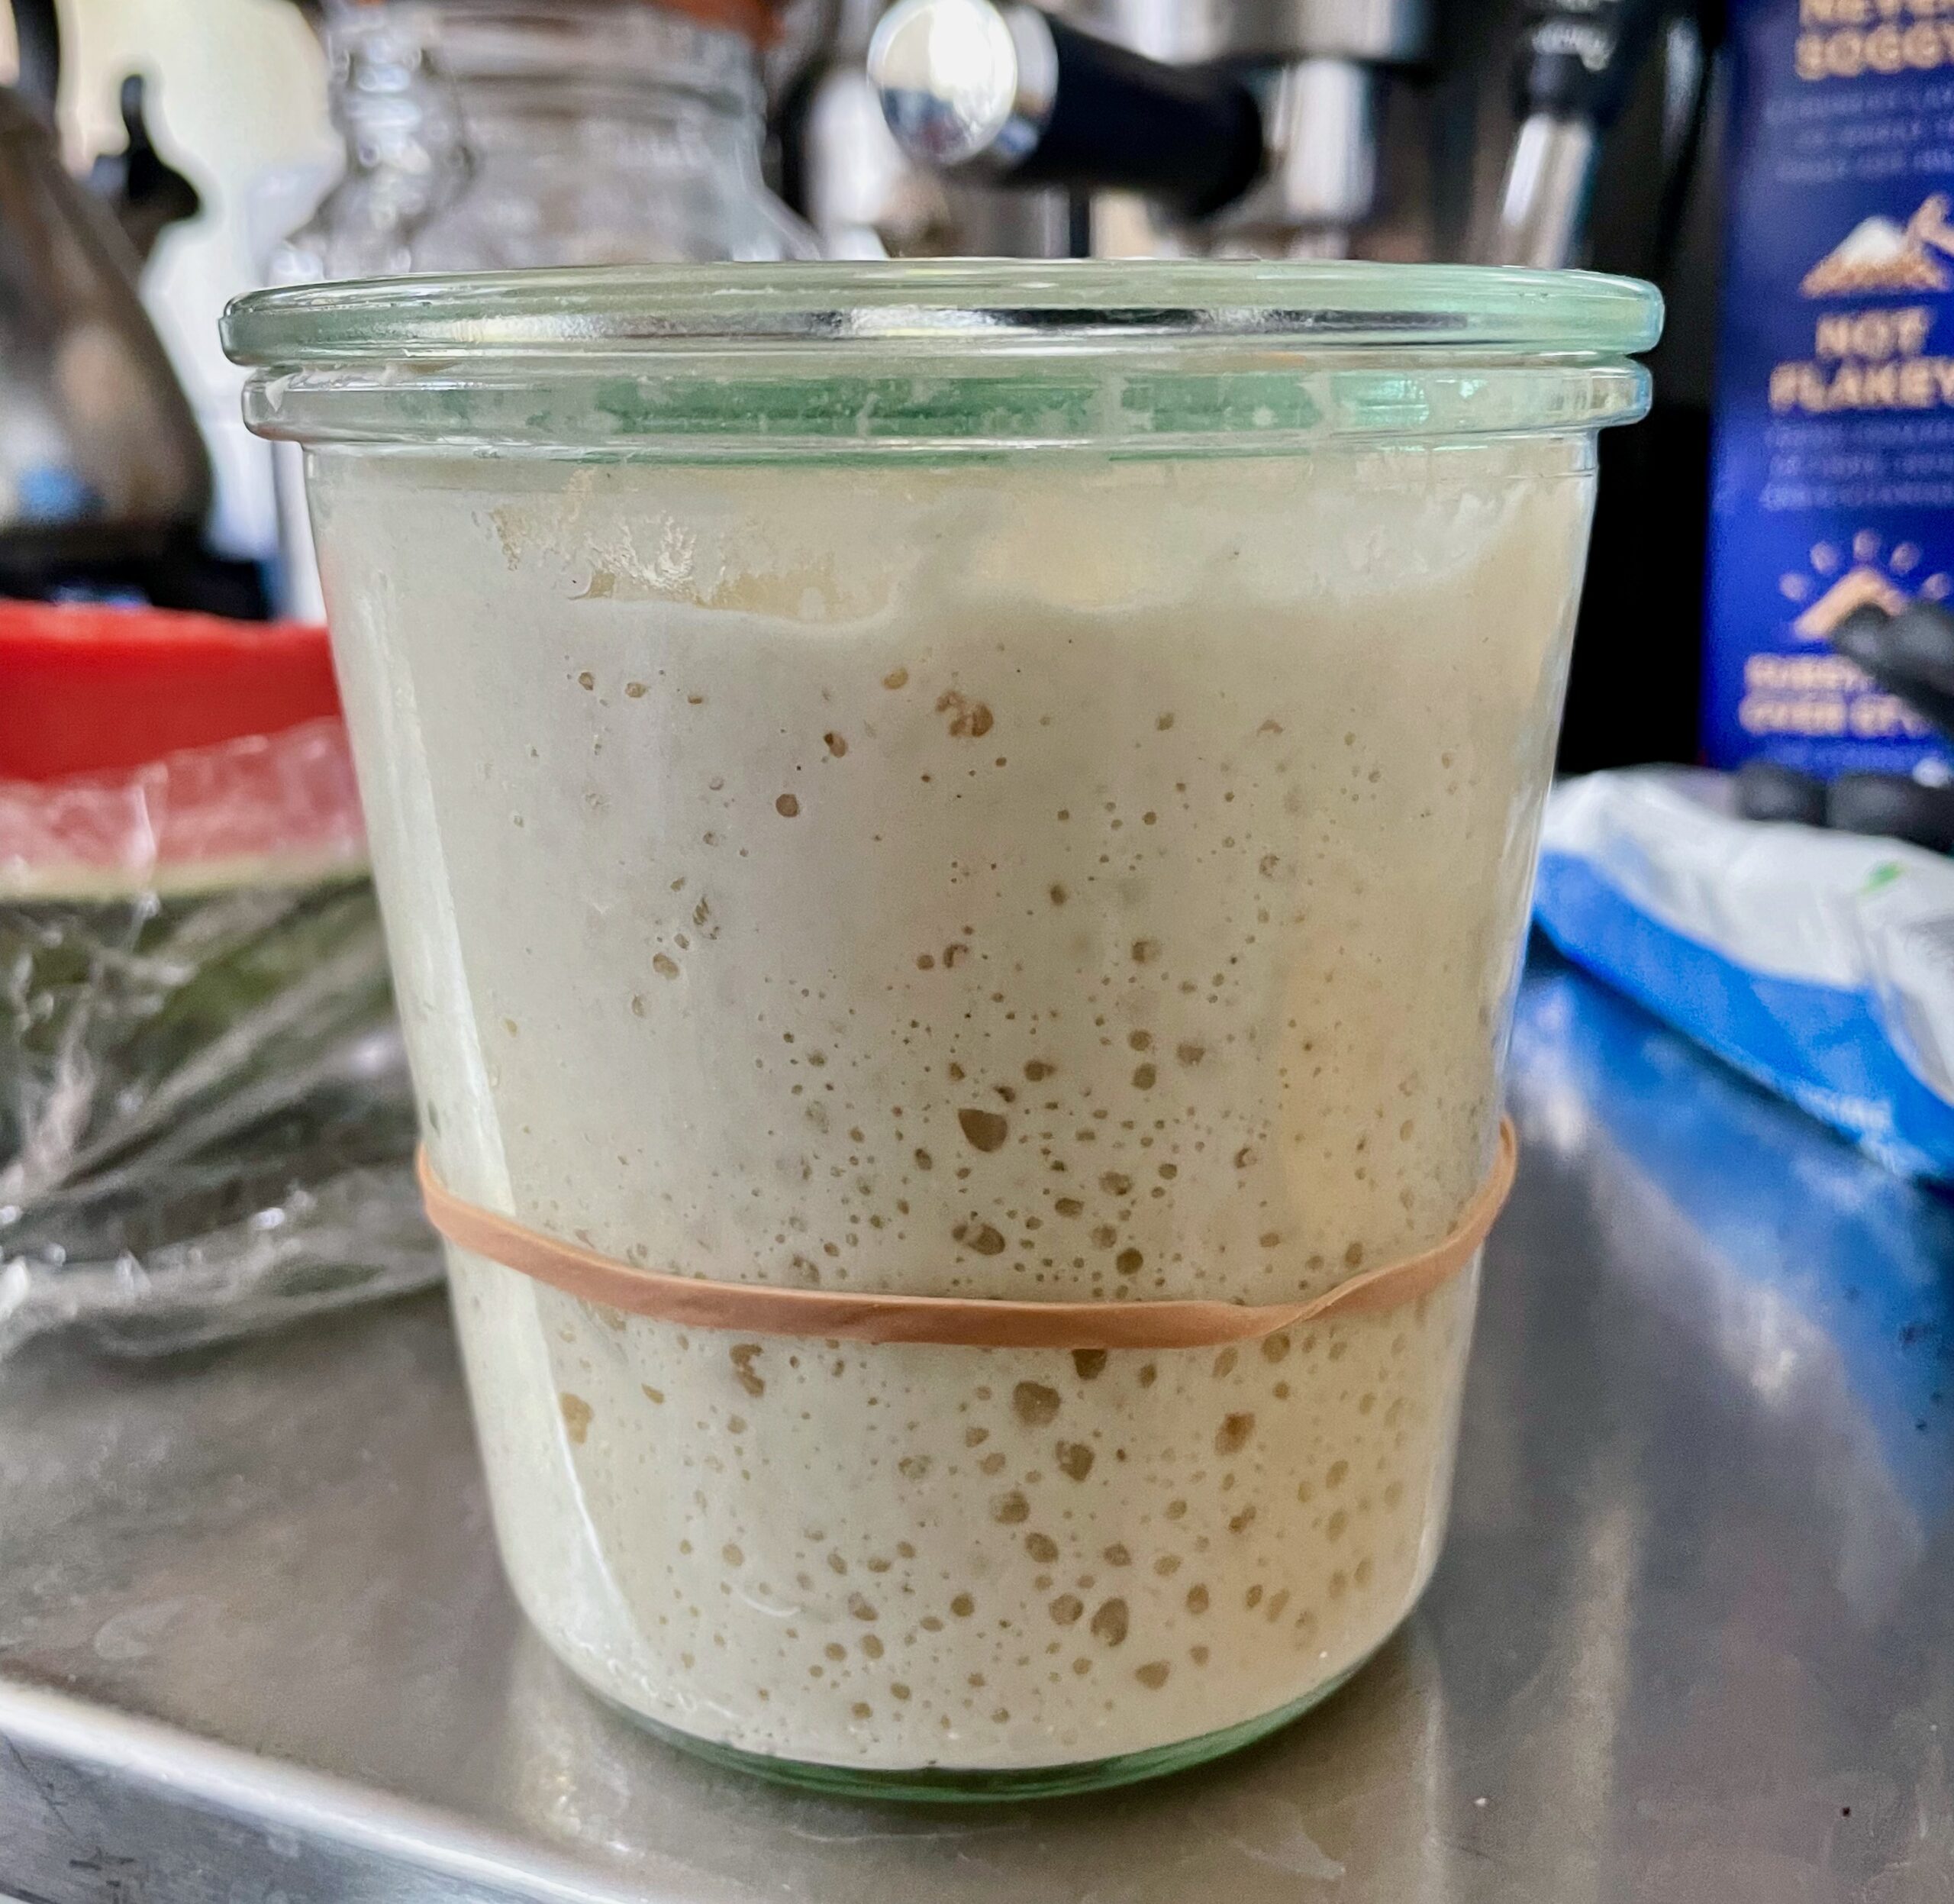
- Start in the evening, last thing before you go to bed; take your starter from the fridge give it a good stir and remove all but a couple of tablespoons worth. Add three tablespoons of the flour you usually feed it with and three tablespoons of water. Take care not to fill the jar over half full, mark the final level with a rubber band and leave out in the kitchen (if your kitchen is really cold overnight, move it somewhere warmer – you could even take to your bedroom!)
- First thing on day two check the starter – hopefully it is really active and grown up the jar. In a large bowl (and if you are making two loaves it will need a big bowl) mix together the flours and water, this is called an autolyse. You can use a spoon or a danish dough whisk to do this, but just using your hands works really well too. Once combined cover the bowl with a tea towel and leave for about an hour.
- Add the salt and sourdough starter, and combine with your dough whisk or by hand. Cover and leave for at least 30 minutes but no more than 2 hours.
- Feed the starter one more time with 2 or 3 tbsp of flour and water (this is a good time to move it to a clean jar if needed) and put in the fridge (see how to look after my starter)
- Now you are going to stretch and fold the dough, this develops gluten which makes the dough stretchy and traps air helping form holes. See below for a video demonstrating this technique. First, wet a hand with cold water. Keeping the dough in the bowl slide your wet hand under an edge of the dough and then pull it upwards about 45cm/1 1⁄2ft stretching the dough. Then gently fold the stretched dough back onto the mass. Turn the bowl a little less than a quarter turn, slide your hand under the dough and again pull up to stretch. Repeat a further 5-6 times till you’ve worked your way all the way around the bowl. Cover again with a tea town and leave to rest for 30-60 minutes.
- Repeat the stretch and fold process in the previous step two more times, leaving 30-60 minutes between them.
- It is probably about lunch time, and you have stretched your dough three times, you can now leave your future loaves to grow in a process called bulk ferment. Leave it somewhere warm covered with a tea towel to double in size. This will probably take 3-5 hours. If it has doubled in size and you are not ready to form the loaves put the dough in the fridge, where it will keep for a couple more hours.
- Once the dough has doubled in size you can form the loaves. See below for a video which shows how to form loaves. The plan is to form the dough into a tight ball, with tension along the top surface. We will do this in two stages, the first one is called the pre shape. Empty the dough on to a clean work surface, and if you are making two loaves separate it into two in proportion to the final loaves (50:50 or 60:40 for a large and medium loaf). Mix together equal parts of strong white bread flour and rice flour and dust a little on to the top of the dough mounds and dust a metal bench scraper. Slide the bench scraper under the dough and using a twisting motion pull the dough around, adding tension to the top to form a ball. Do this a couple of times on each loaf tightening the dough with each turn. Leave for 15 minutes.
- Whilst the dough is resting prepare the bannaton by dusting it liberally with the strong white / rice flour mix.
- To do the final shape repeat the slide and turn motion in stage 8 tightening the ball further. Once happy gently move the ball with the aid of the bench scraper to the bannaton with the tight surface down (this will be the top of the finished loaf). Once in the bannaton you can pinch together the dough a bit further increasing the tension. Cover the loaves and put in the fridge for the final prove overnight.
- The following morning put the casserole dish in the oven (without the lid) and heat the oven and empty dish at 250C fan / 260C non-fan / 500F for 30 minutes. This is very hot and some ovens have special bread settings – if in any doubt check the oven’s instructions.
- Nearing the end of the heating time lay a strip of baking parchment about 10cm wide on a work surface and gently tip the loaf out of the bannaton into the centre of the paper. Gently dust away any excess flour and with a lame cut a deep gash to one side of the loaf from edge to edge.
- Take the casserole dish from the oven (it will be really hot) and holding the edges of the parchment lower the loaf into the dish. Cover with the lid and put in the oven for 25 minutes.
- Once the time is done carefully remove the lid and reduce the oven temperature to 220C fan / 230C non-fan / 420F. Bake for 25 minutes for loaves cooked in a 20cm dish and 35 minutes for loaves in a 25cm dish.
- Remove from the oven and the dish and put on a cooling rack. Leave to cool for at least 2 hours, whilst tempting the crust develops its crunchiness as the loaves cool.
- Uncut loaves can be stored in a cotton bag, but cut loaves should be stored in a plastic food bag.
Tips
- For added crunch and a protein boast, after shaping the loaf sprinkle it with a handful of seeds (sesame are good) and sprinkle a few more around the proving basket. The seeds will stick to the loaf and create a seedy coating.
- If not cleaned quickly bread dough will go really hard and be difficult to clean – its best to clean dishes, and tools as soon as you have finished using them, or leave them to soak under water.
- If you get used to making this loaf then do experiment with other flours such as spelt or einkorn or additions such as seeds, malted grains or kibbled rye. When adjusting the recipe keep the total flour within the total given in the recipe and keep specialist seeds and flours to no more than 15% of the total flour and seeds or grains at no more than 2% of the total flour. Please do share any experiences with adjusting, and I may also do a future post about bakers percentages, which really help with this – let me know below!
Guidance videos