Special breakfast treats
Making viennoiserie – croissants, pain au chocolat, pain aux raisin – is often used to differentiate experienced bakers from those starting out, and it was the case that when I first learnt to make them successfully I did feel like I had moved up a level with my baking.
They are not hugely complicated if you allow yourself enough time and take each stage carefully. No recipe is completely error proof, but in mine below I have written with a single aim in mind, that homemade croissants are best eaten on the morning of a special day. The three stages and timings are laid out to achieve that aim. You need to start around lunchtime the day before you want to eat your pastries, and have a little time in the evening to laminate and be able to start two hours before you want to eat them in the morning.
This recipe makes croissants and pain au chocolat, how many of each depends on how big you want them and what proportion of each.
I have included leftover cinnamon buns to make some really easy, crunchy cinnamon buns.
This yields enough viennoiserie for 6-8 people for breakfast.
Read the recipe before you start.
For viennoiserie you will need…
Croissant dough
- 500g strong white bread flour
- 40g caster sugar
- 10g salt
- 10g quick yeast
- 125g whole milk
- 125g water
- 250g unsalted butter (cold)
- 1 egg and pinch of salt (for egg wash)
Pain au chocolat
- Croissant dough (above)
- Up to 200g dark chocolate
Leftover cinnamon buns
- Dough offcuts from croissants / pain au chocolat
- 2tbsp caster sugar
- 2tsp powdered cinnamon
- 4-6 cupcake/muffin cases (reusable ones work really well)
You will also need two trays with raised edges around 30×40cm (12×16inches) lined with baking parchment or silicone baking sheets.
Method
Stage 1 – making dough
Do this early afternoon the day before you want the croissants. This stage takes about 15 minutes.
- Weigh out the flour, sugar, yeast and salt into a large bowl. Stir to combine and make a well in the centre. Add the milk and water and mix to form a stiff dough. If it is too dry add a splash more milk but do not add too much as the dough needs to be quite firm. You can also do this step in a mixer, use a dough hook and mix until the dough comes together.
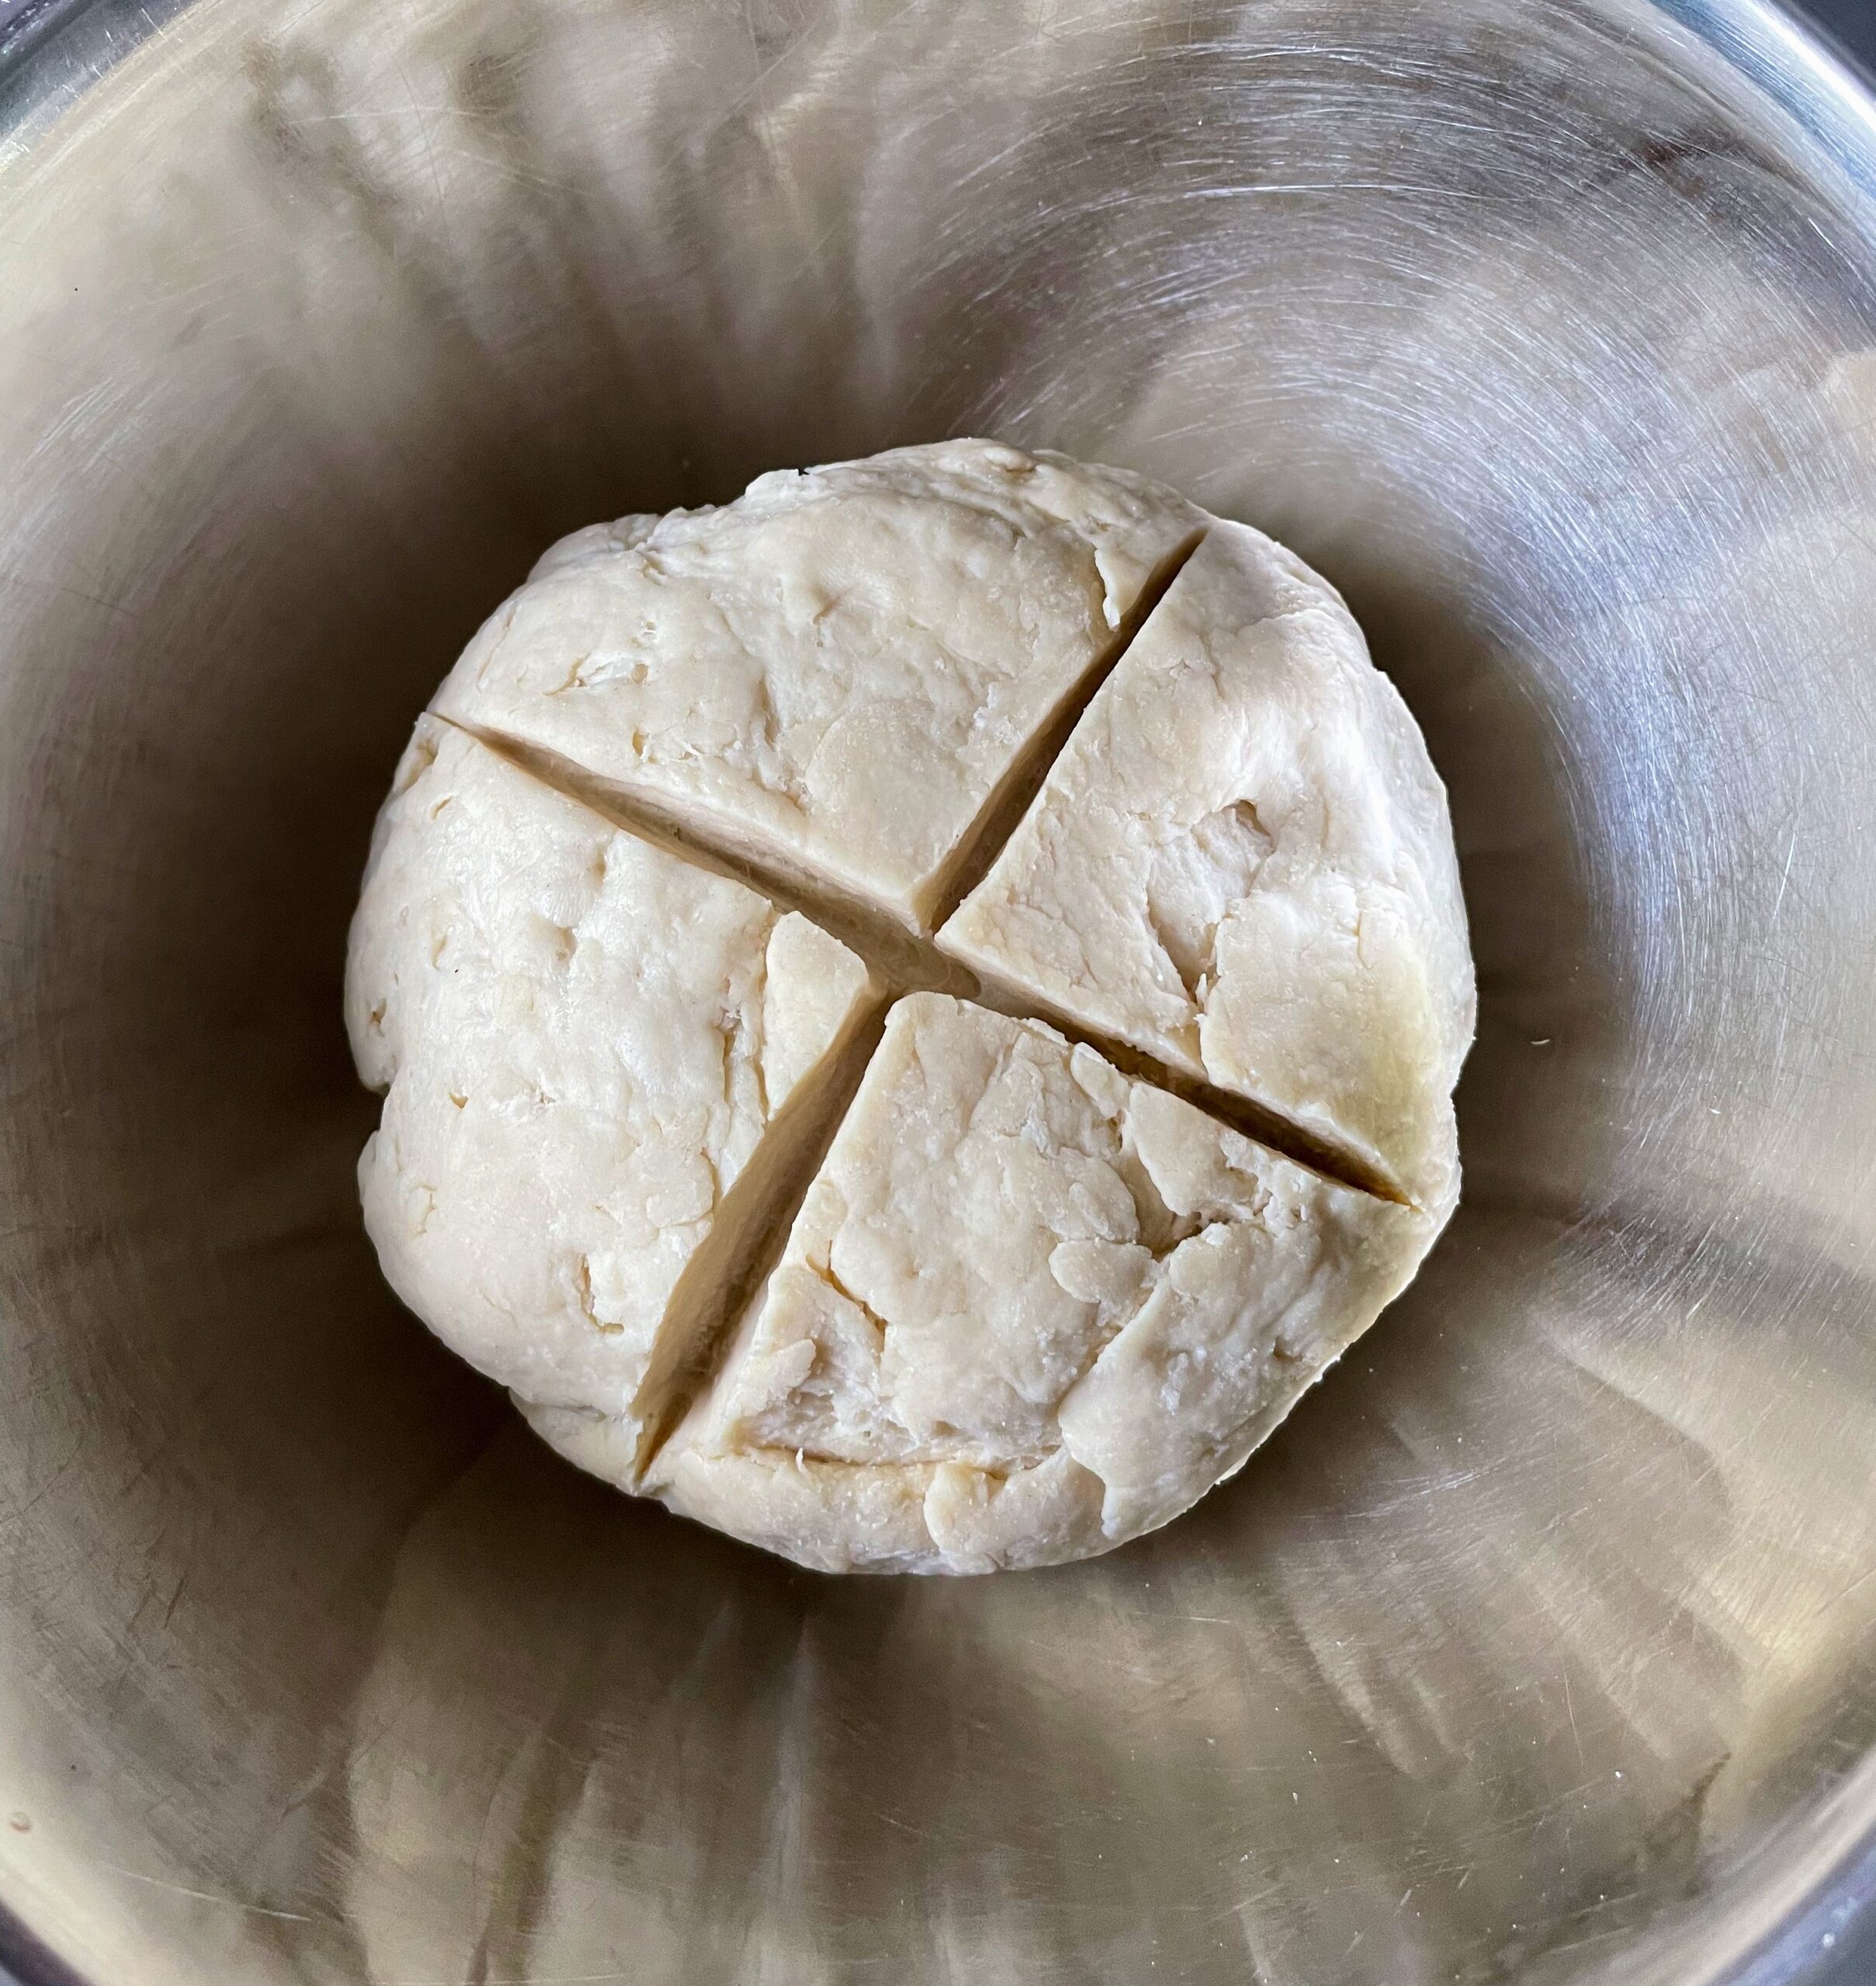
- Tip the dough onto a work surface and form into a ball. Avoid kneading it too much. Once in a ball slash the top with a sharp knife twice to form a cross.
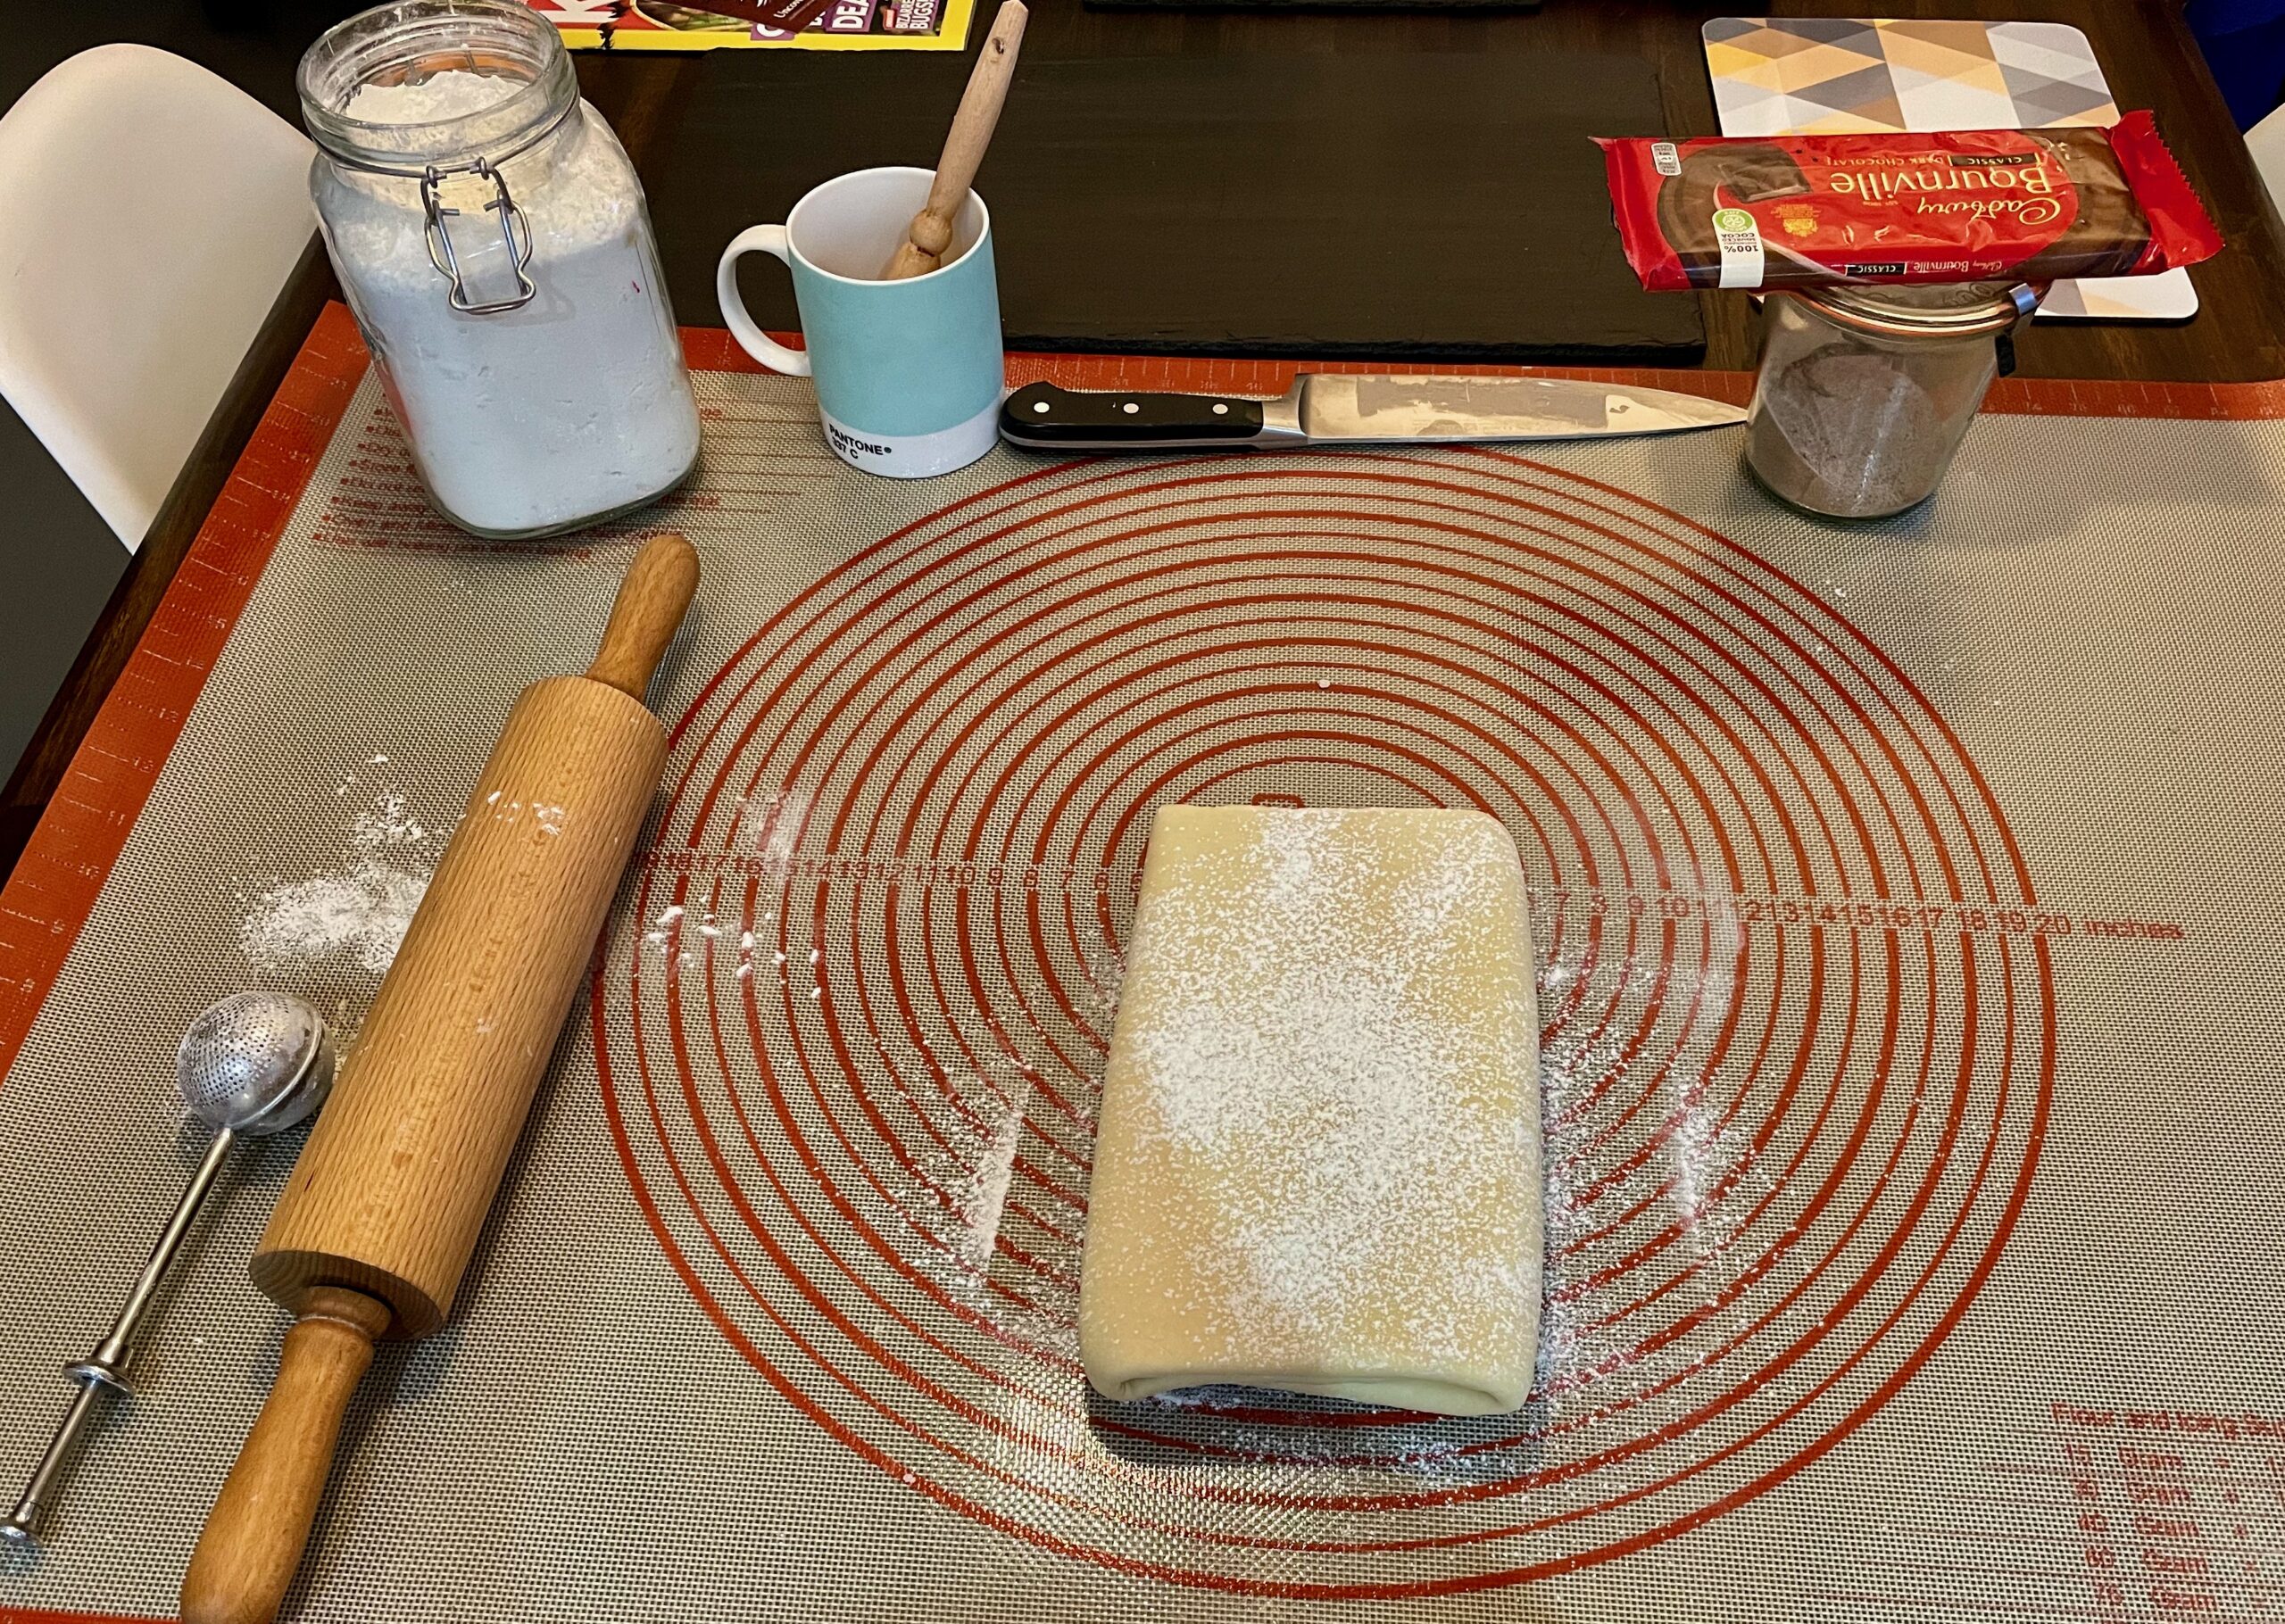
- Place the ball in a clean bowl, cover with film and place in the fridge for at least two hours, though longer is fine (see photos).
Stage 2 – lamination
Do this stage the evening before you want the croissants. Overall, it will take about an hour including 20 minutes hands-on time.
- Unwrap the butter and cut it into four slices along the short edge. Arrange the slices into as near a square as you can on a silicone sheet or sheet of baking parchment. Using a rolling pin and another sheet of baking parchment (or the butter wrap) roll and shape the butter into a square about 20×20cm (8×8inch). You want the square to be reasonably neat and even in thickness, so off trim any excess, and spread it into any thin areas. Once shaped, place the butter back into the fridge whilst you do the next step.
- Take the dough from the fridge and place on a lightly floured work surface. Using the corners formed from the cross in the top roll the dough into a square about 35×35cm (14×14inch).
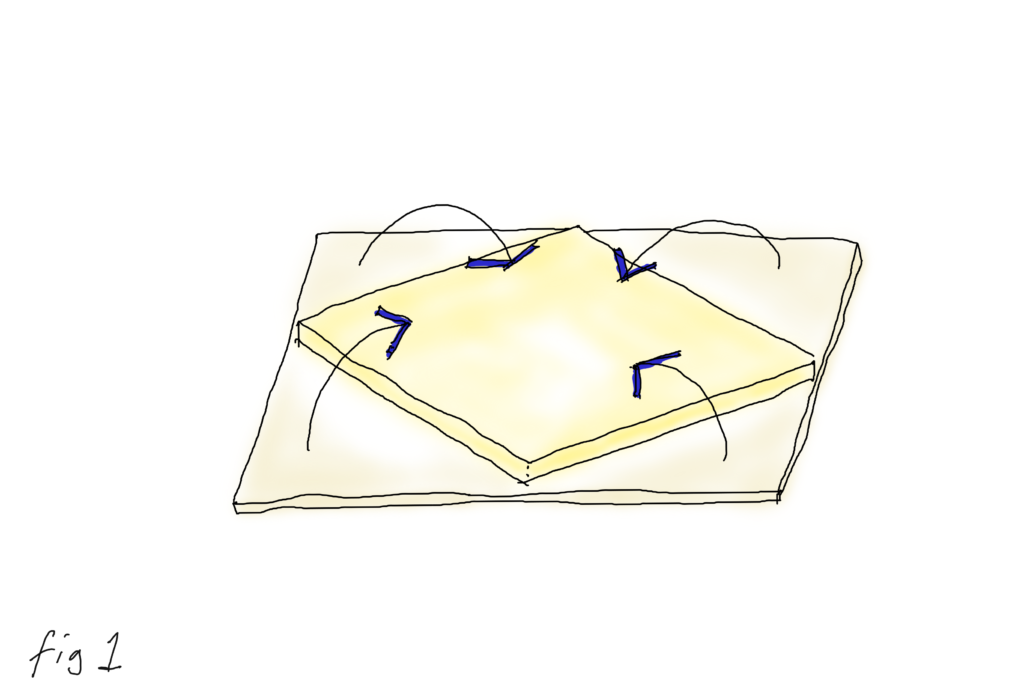
- Place the square of butter in the centre of the dough square, with the sides of the dough and butter at 45° to one another (see figure 1)
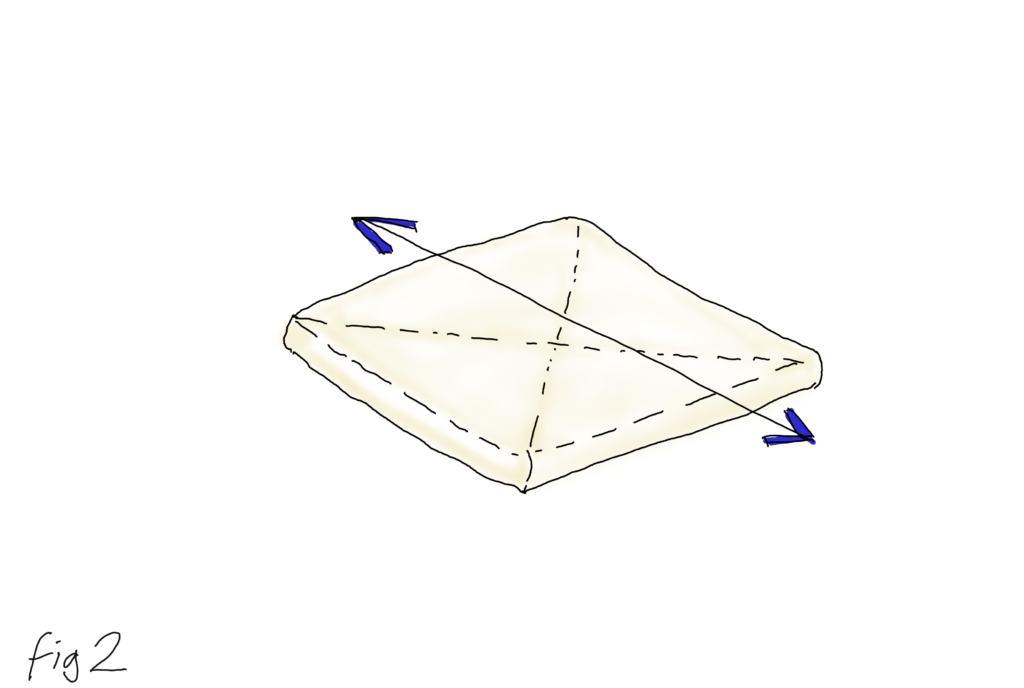
- Fold the sides of the dough over the butter to completely wrap the butter in dough (see figure 2) but avoid overlapping the dough too much. Excess dough can be trimmed off and used to cover any gaps using a pastry brush and water to stick the dough.
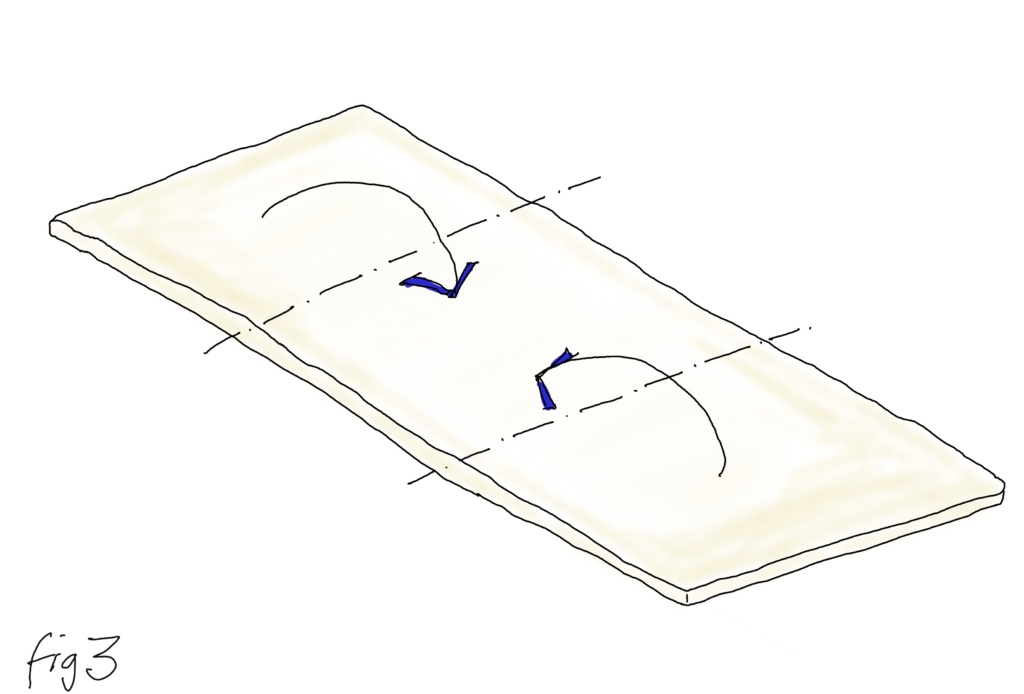
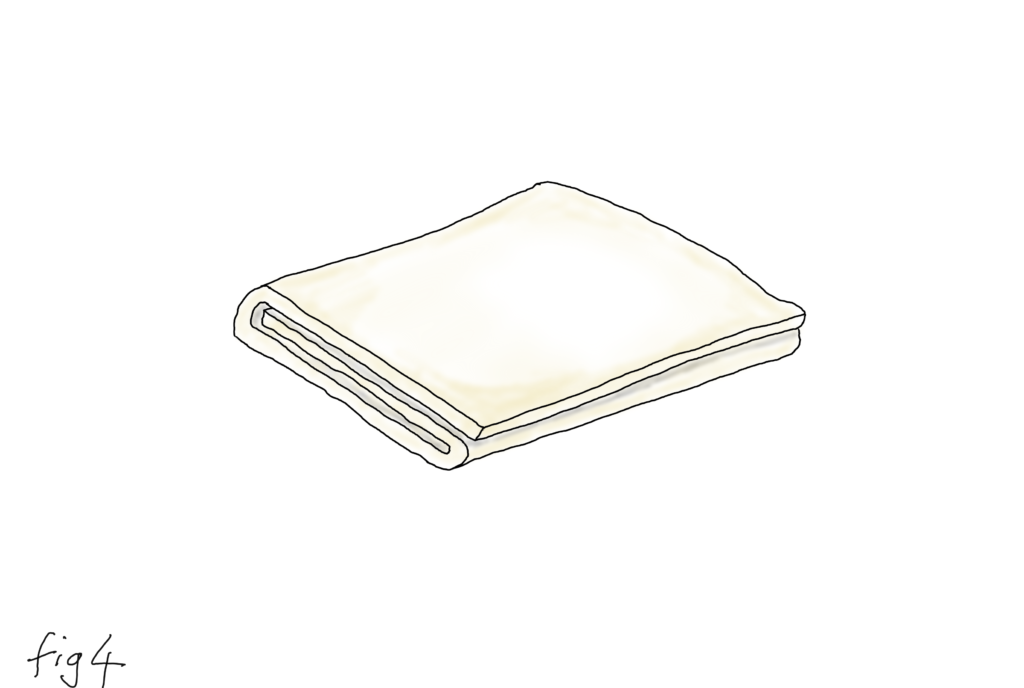
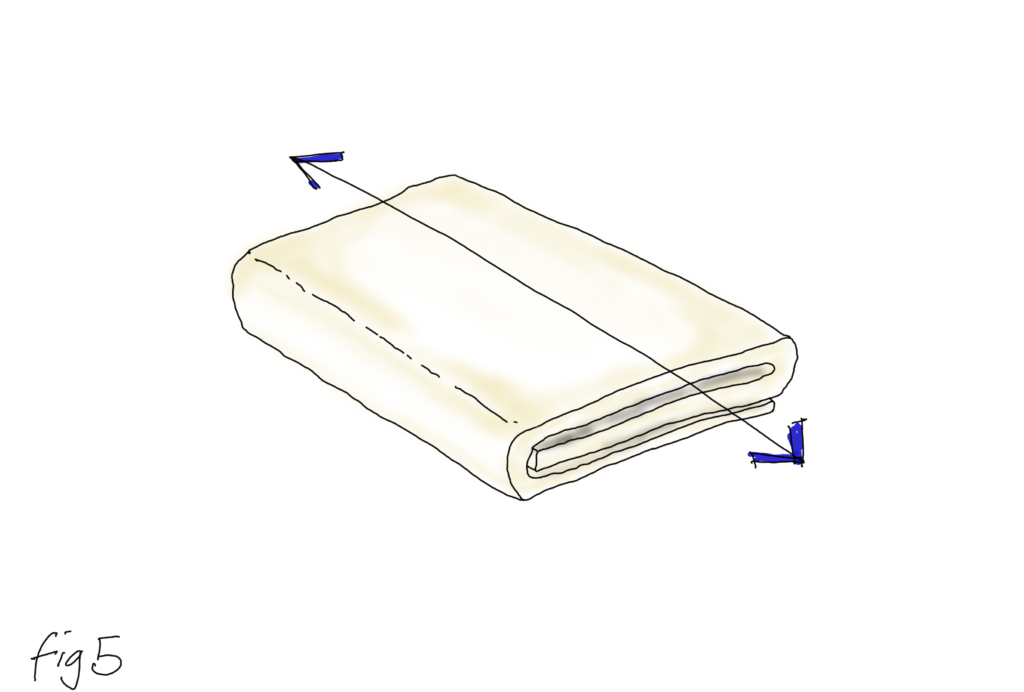
- Roll the dough out in one direction until it has tripled in length (see figure 3) and fold the dough into thirds (see figure 4) – this is the first roll and fold. Wrap the dough in film, or put in a plastic food bag and place in the fridge for 20 minutes.
- Remove the dough and place it on the work surface with the seam on the side (see figure 4). Roll again until tripled in length. Fold the dough in thirds – this is the second roll and fold. Wrap the dough back in the film (or put back in the plastic food bag) and place in the fridge for 20 minutes.
- Repeat step 6 to do one more roll and fold. The dough now has 55 layers, 27 of butter and 28 of dough. Once again wrap the dough in film, put in food bag and place in the fridge overnight.
Stage 3 – shaping the pastries
Start this stage 2 hours before you want to eat your pastries as it includes about 30 minutes preparation, proving time and baking.
- To make the egg wash, break the egg into a cup or small bowl, add a pinch of salt and stir to break up the egg and combine. If the chocolate is in a bar break it up and cut large pieces into small pieces about 1cm (½inch) wide.
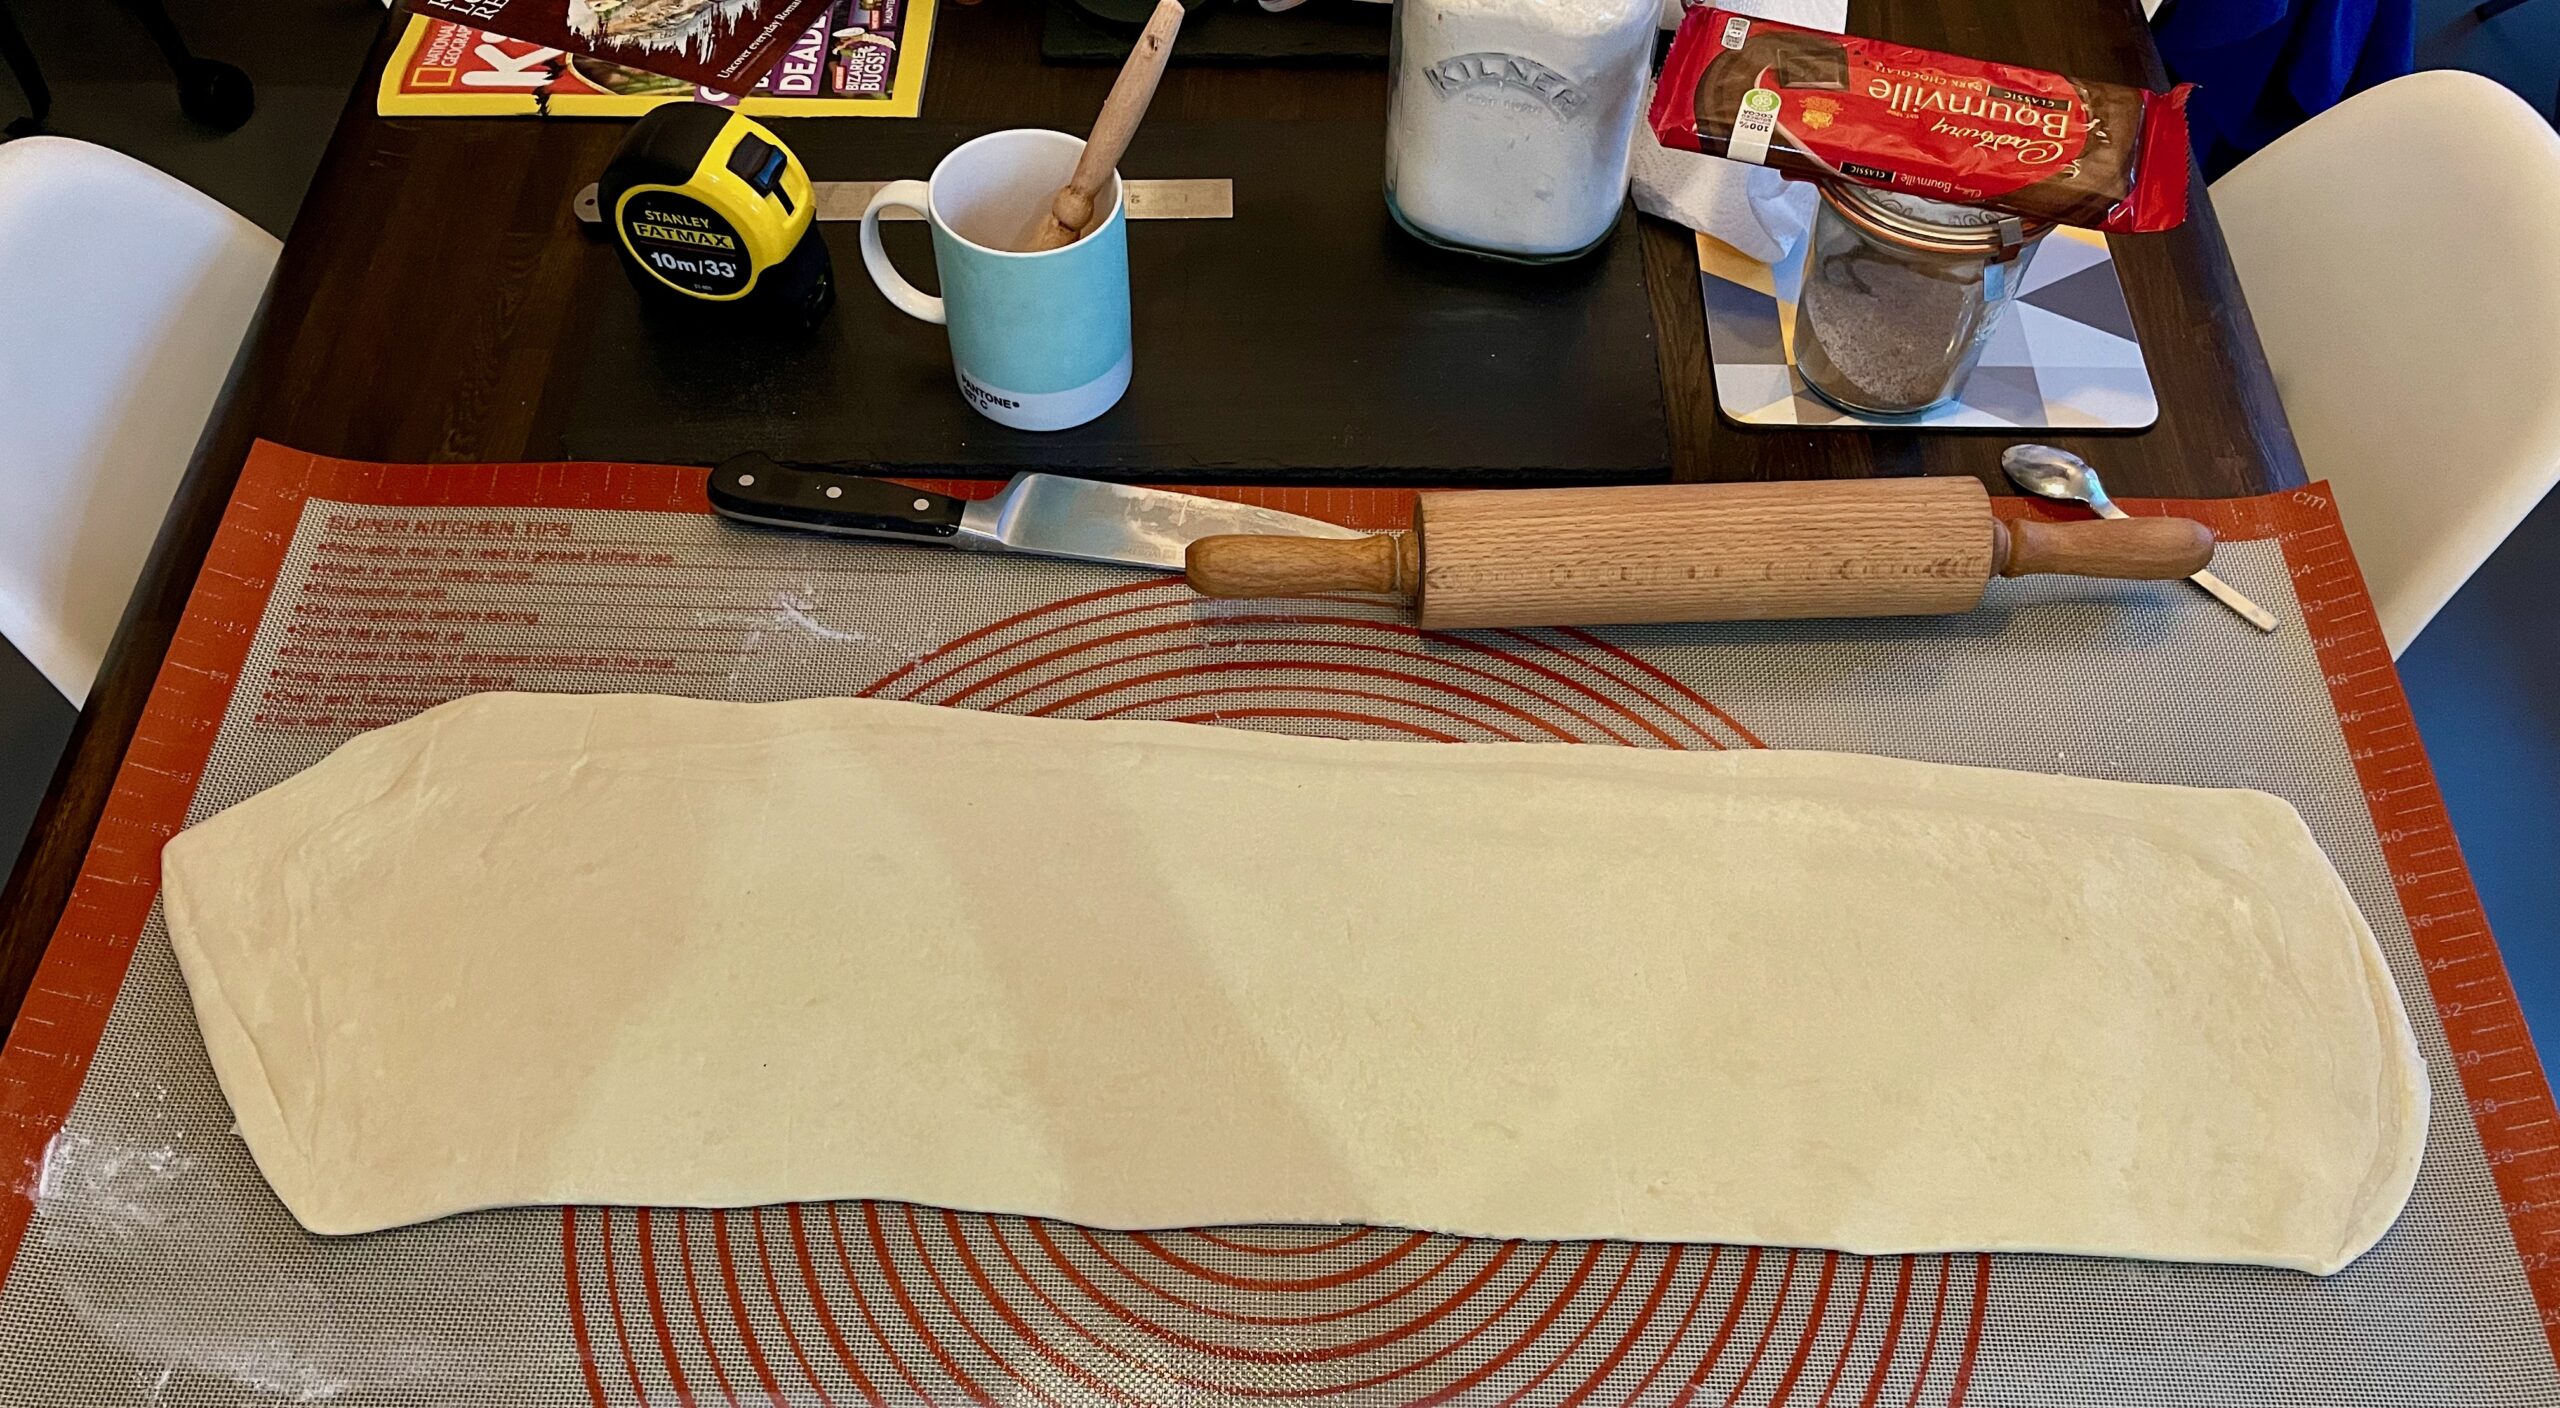
- Remove the dough from the fridge, it is likely to have slightly risen. Place the dough on a large, floured, work surface and roll it out to approximately 80×23cm (31×9inches) with an even thickness. As the dough stretches it will build up tension which you can release by lifting the dough slightly off the surface with both hands. If the dough becomes difficult to roll, take a short break of a minute or two to allow it (and you) to relax.
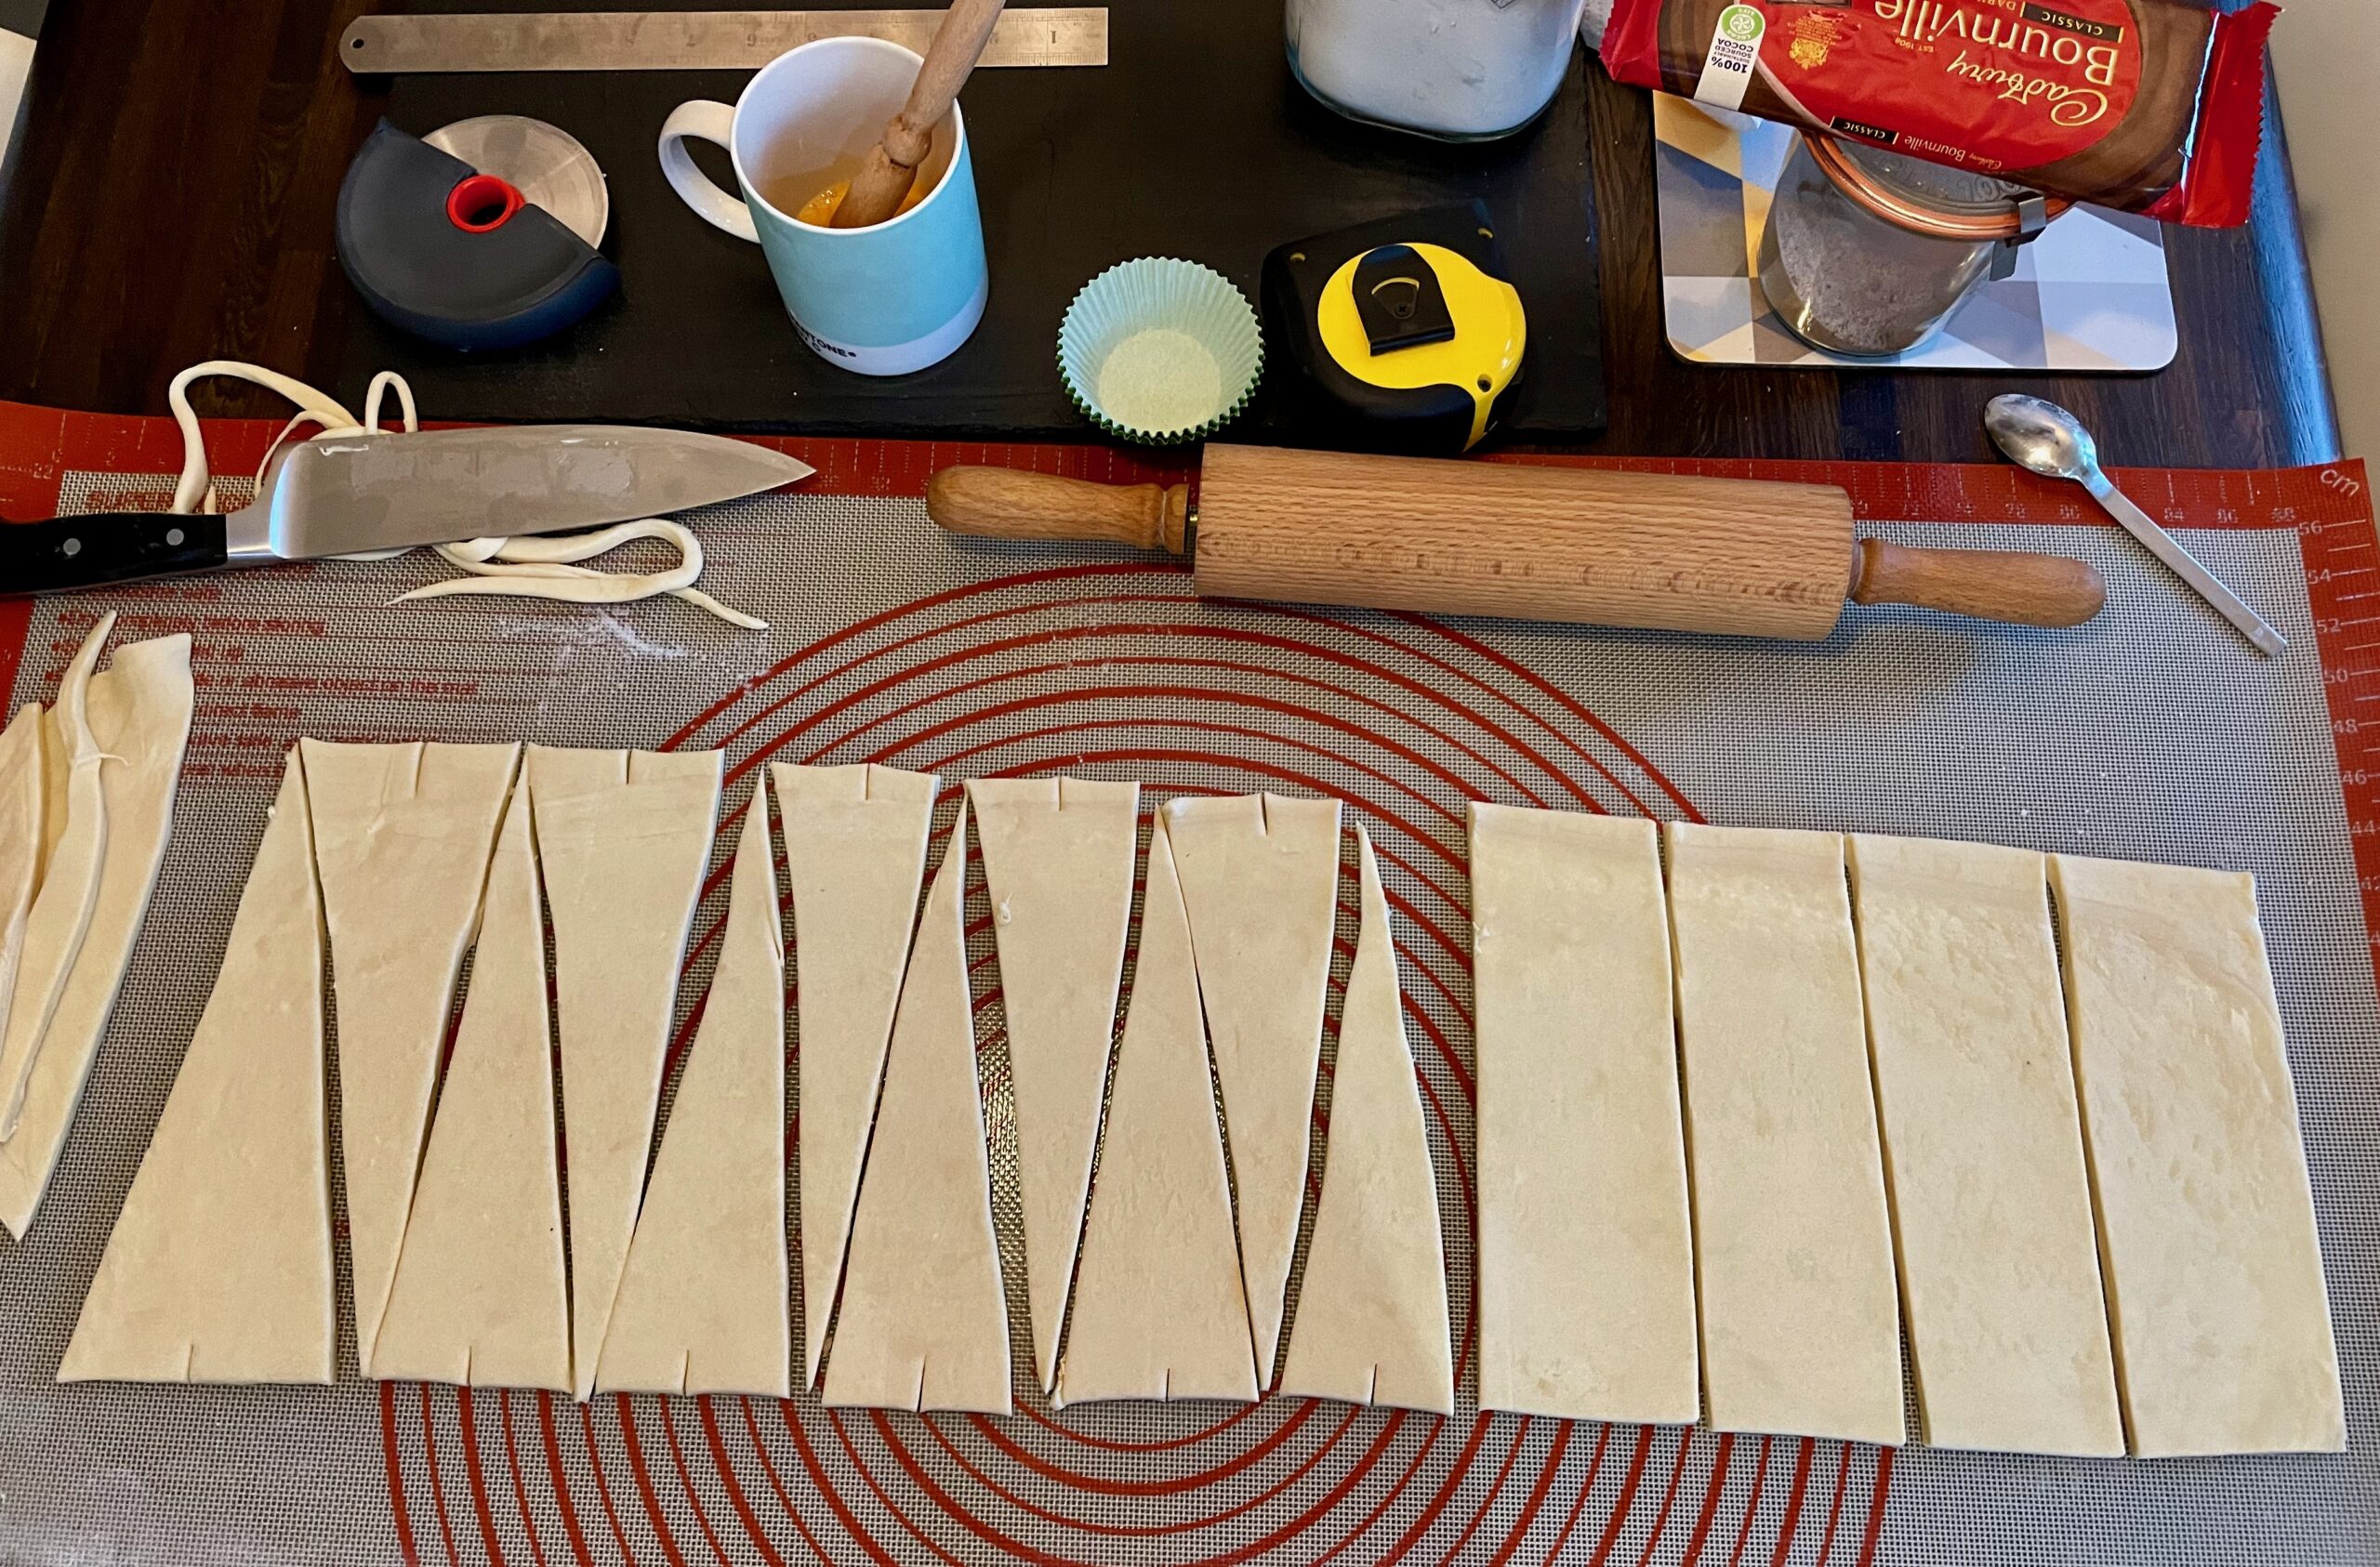
- Once fully rolled out trim the long edges – a pizza cutter is best for this. Save the offcuts (but don’t roll into a ball).
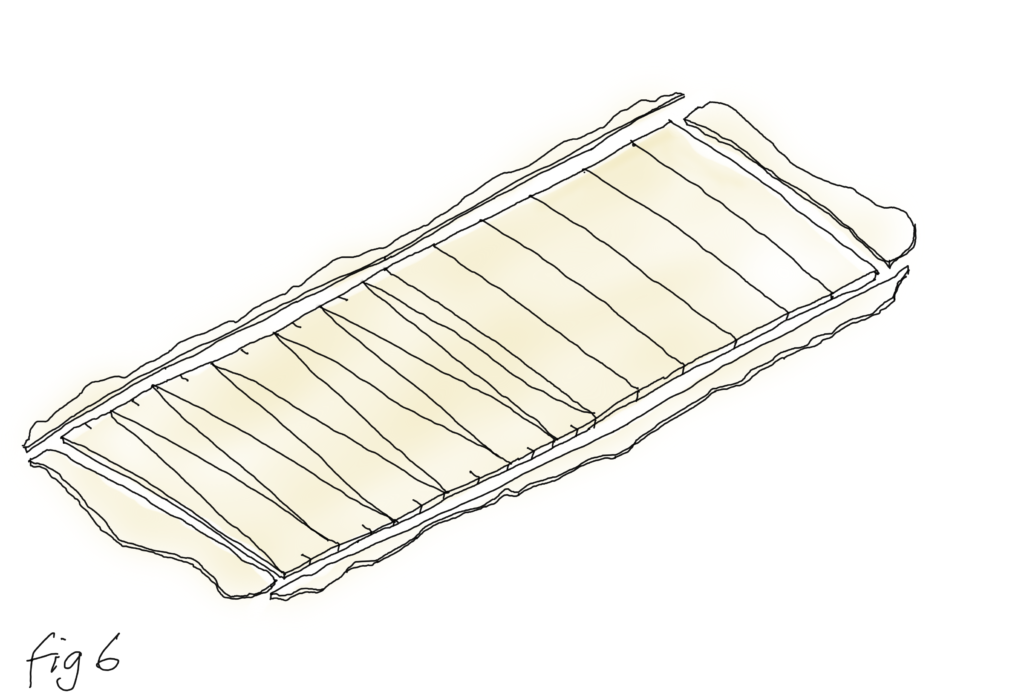
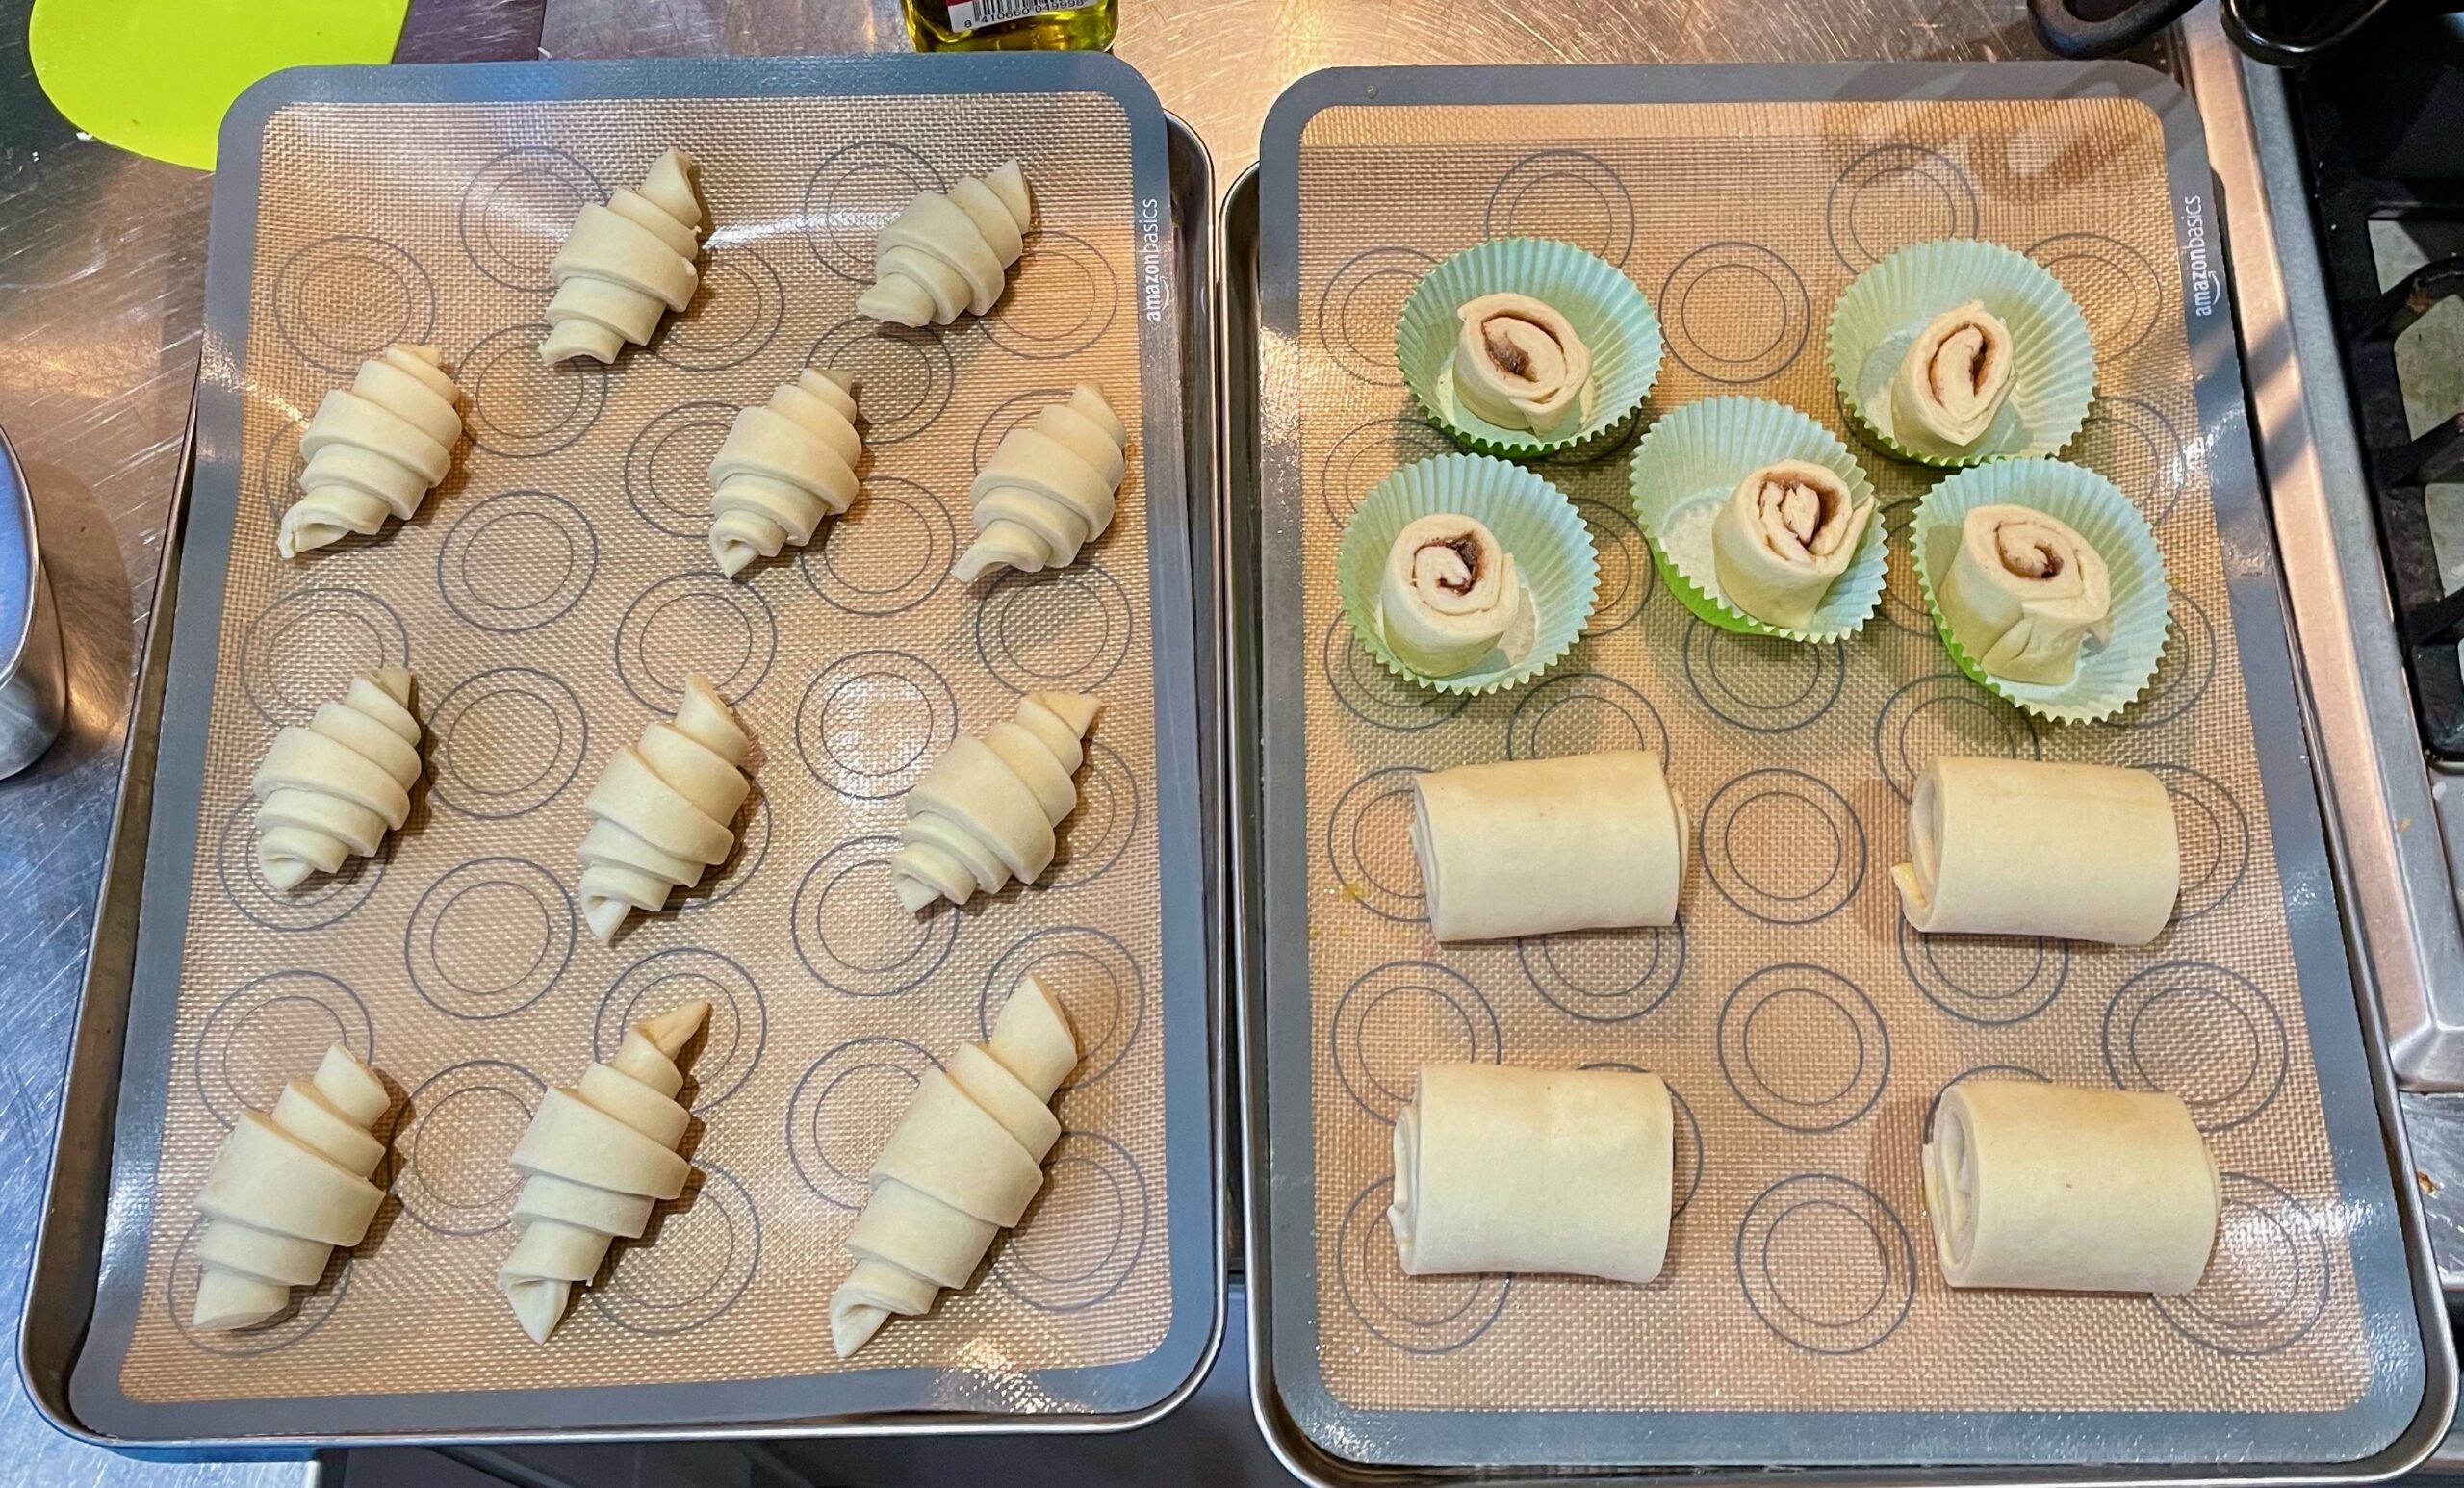
- With a large sharp knife cut the dough across its width into long thin triangles approximately 7cm (3inches) tapering to point for croissants and rectangles approximately 6cm (2½inches) wide for the pain au chocolat. How many of each is up to you but typically aim for between 10-12 croissant pieces and 4-6 pain au chocolat pieces (see figure 6 and photo). Save any offcuts (but don’t roll into a ball).
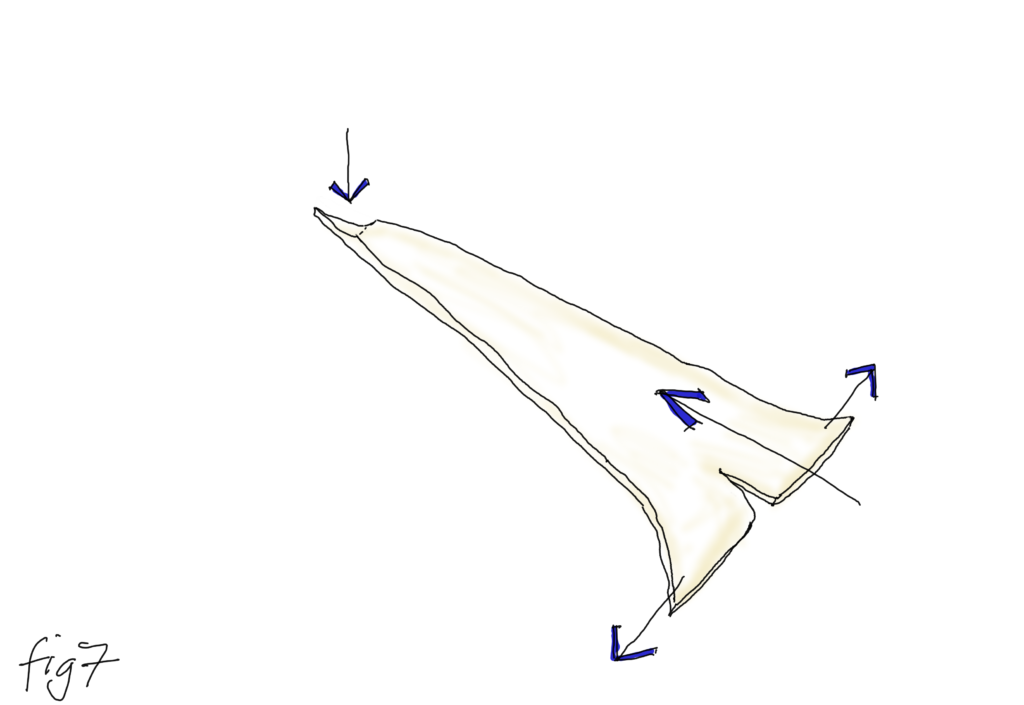
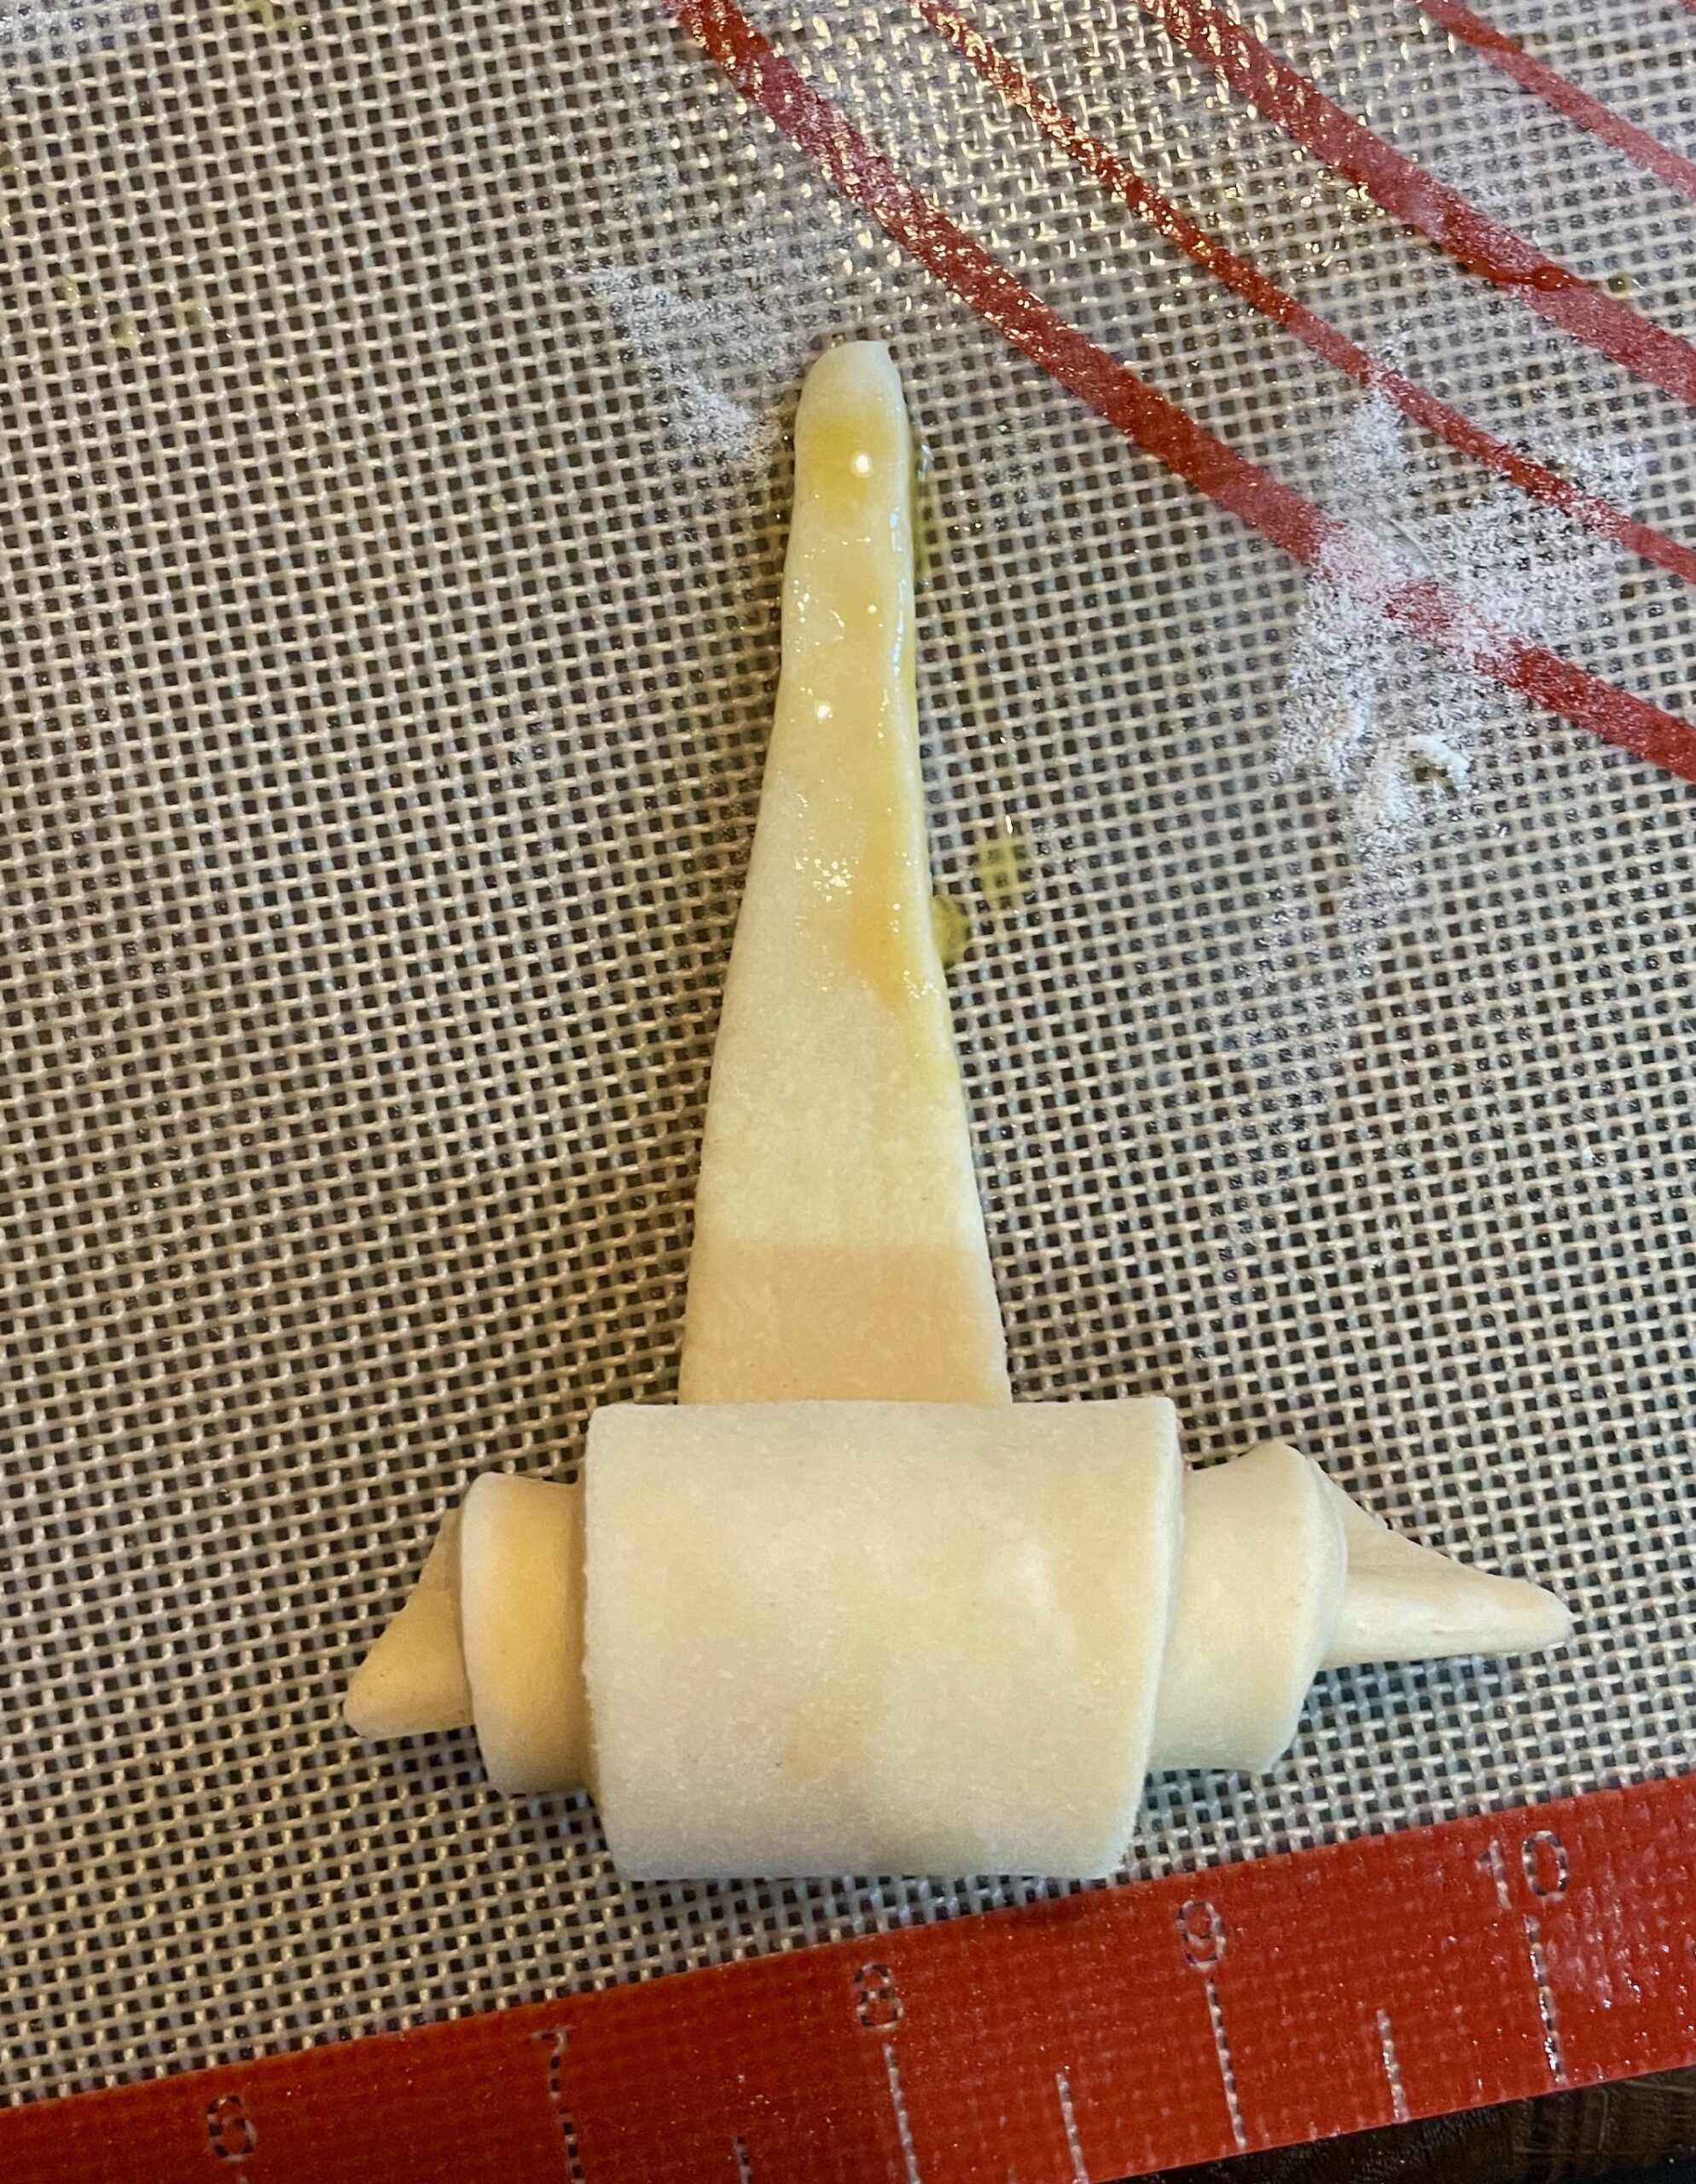
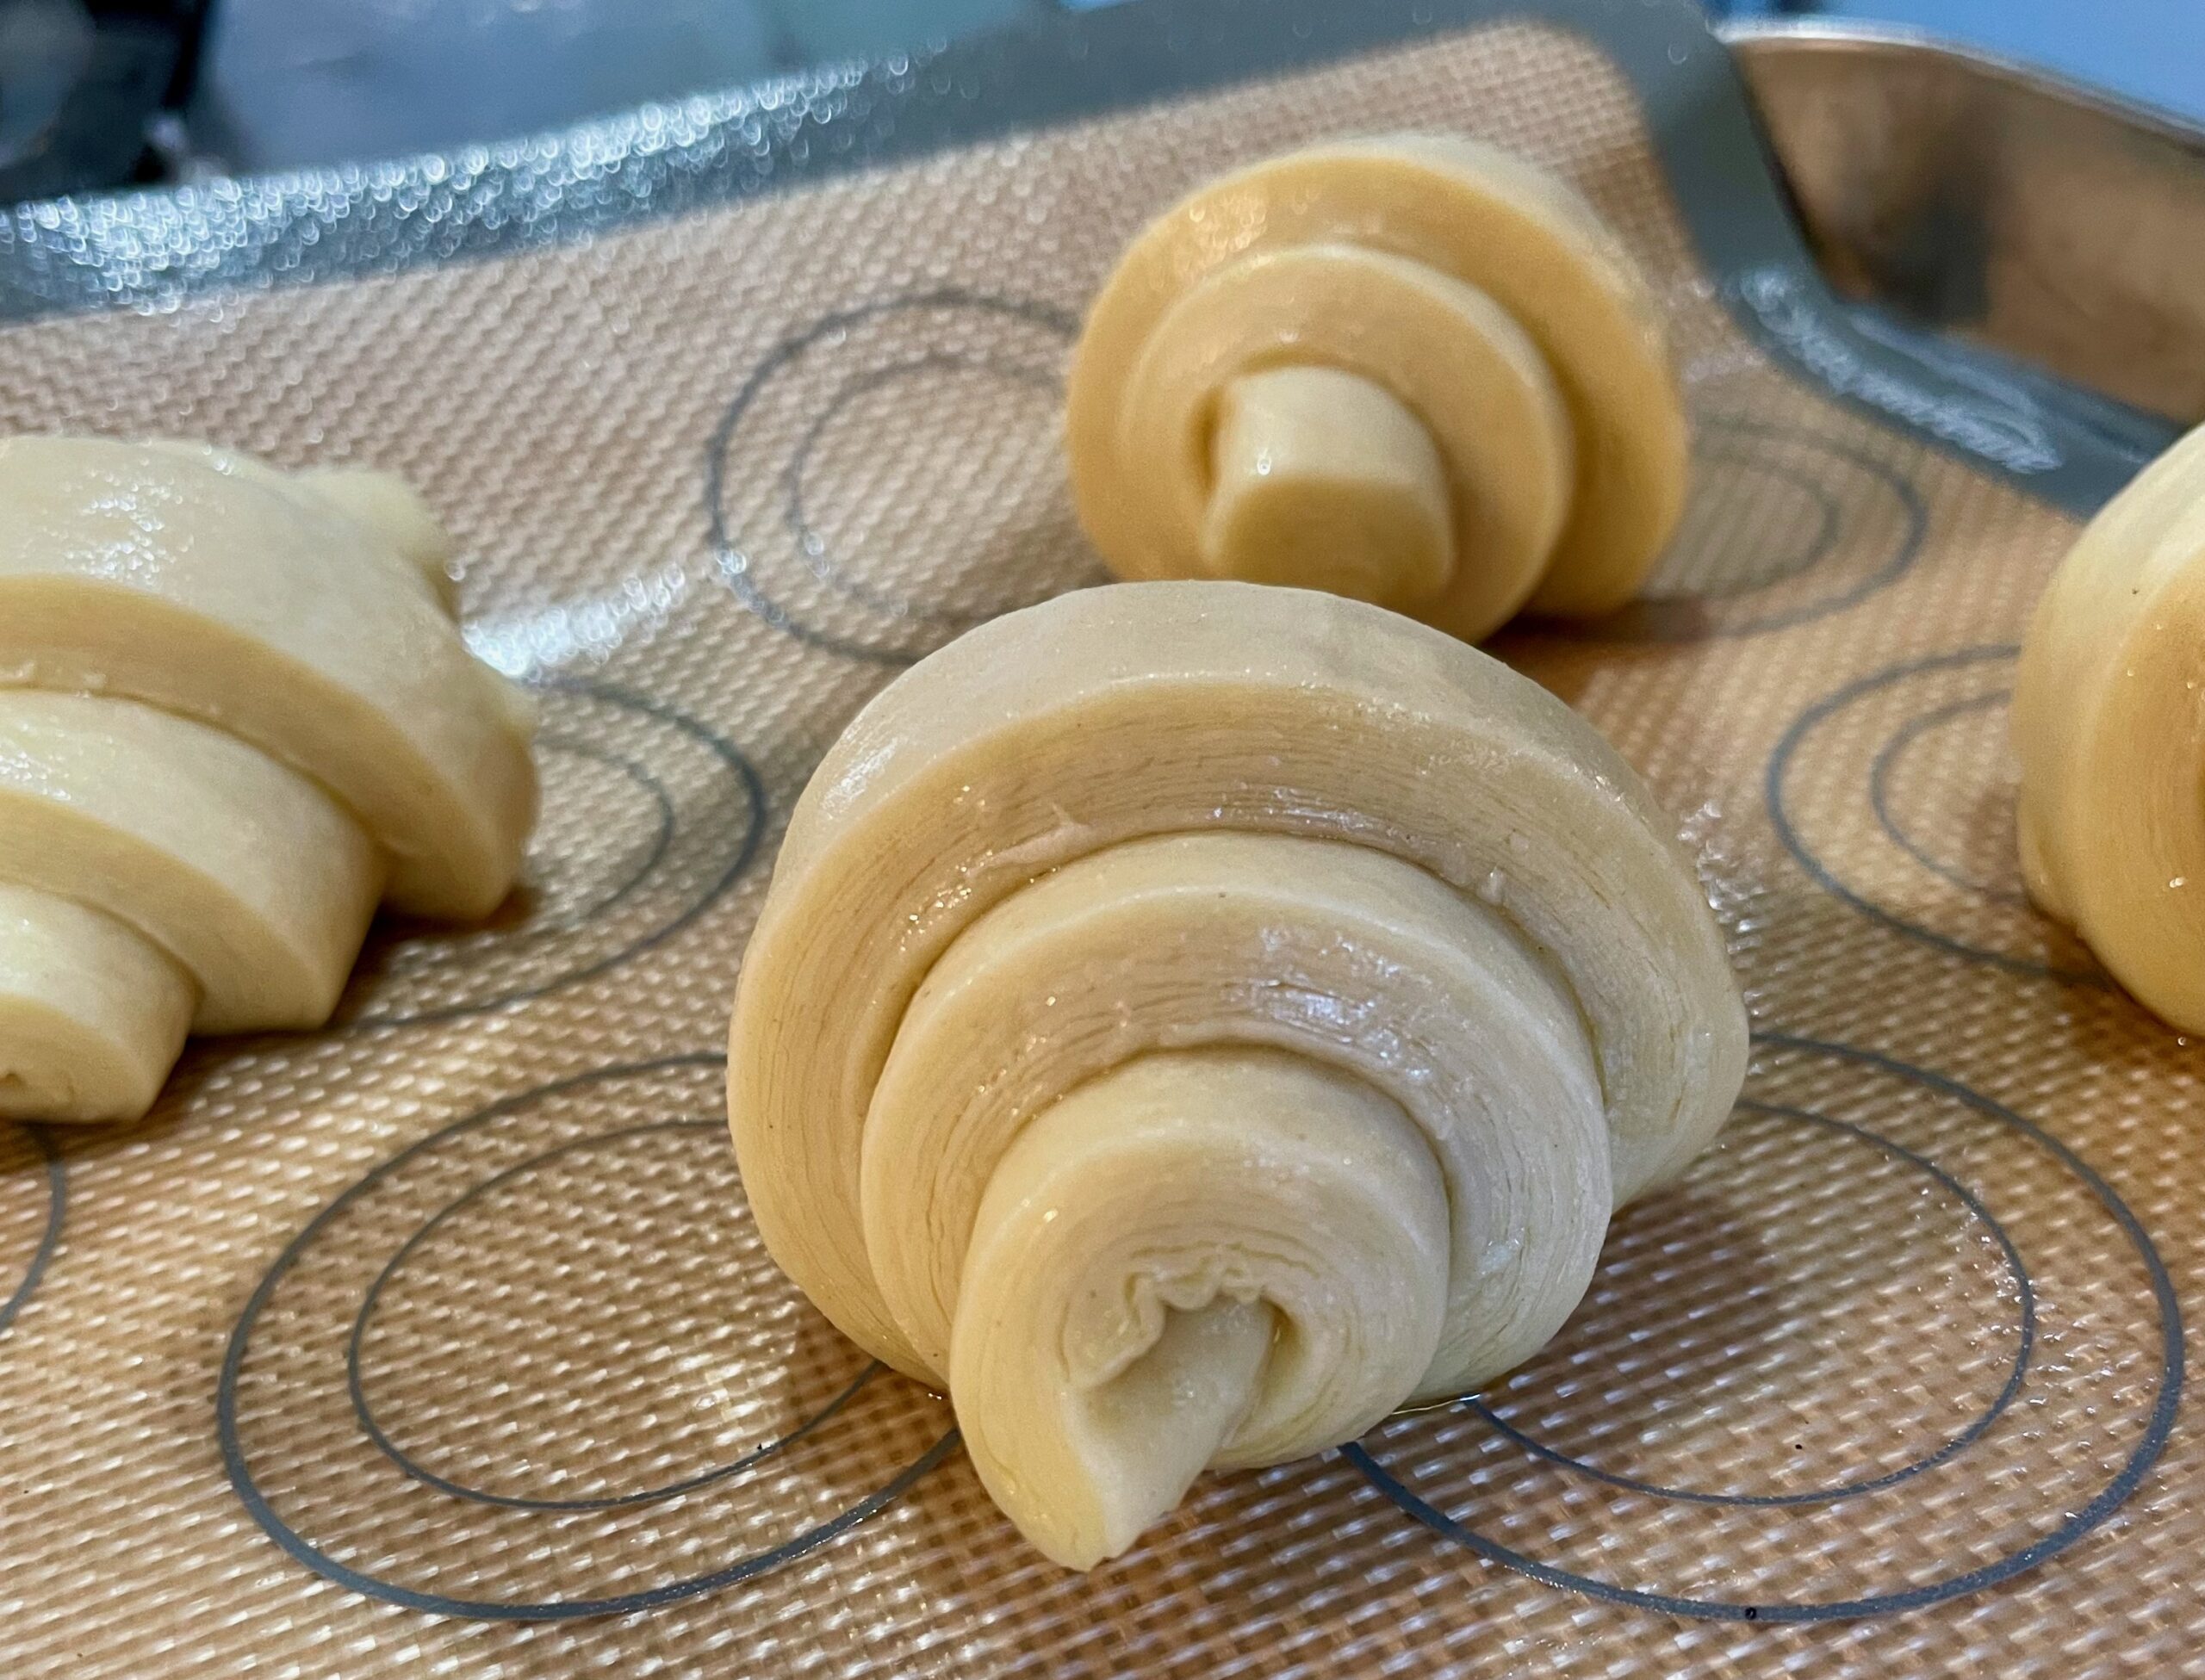
- To shape the croissants, take a triangle of dough and with a long edge facing you cut a small nick halfway along that edge. With your finger, press down the point to stop the dough moving around. Hold the other two corners with your thumb and finger and gently stretch the dough to open the nick you made earlier (see figure 7). Roll the croissant up, and as you get near the point add a dab of egg wash to stick the croissant together (see photos). Place the croissant on a baking sheet with the sealed point on the bottom. Repeat with all the triangles, and place spread apart on the baking sheet.
- To shape the pain au chocolat, take a rectangle of dough and place it with a short edge facing towards you. Use a finger to push the opposite short edge down to stop the dough moving around. Working from the short edge nearest you, add a row of broken chocolate, or chocolate drops along the edge. Roll the dough over once to cover the chocolate and add another row of chocolate on top of the dough you have just turned over. Continue to roll the dough up and just before you get to the end add some egg wash to the squashed edge, then complete the roll and press down lightly to seal. Place the pain au chocolat on a baking sheet with the sealed edge on the bottom. Repeat with all the rectangles, and place spread apart on the baking sheet.
- To shape ‘leftover’ cinnamon buns, mix the sugar and cinnamon in a small bowl. Collect the offcuts of dough and arrange into a rectangle, overlap the edges, and use a pastry brush and water to stick the dough together. Gently roll a couple of times with the rolling pin to push everything together. Quite how big this will be will depend on the number of offcuts you have, but I typically end up with a rectangle about 10×15cm (4×6inches). Paint the rectangle with egg wash and cover the egg wash with a thin coating of cinnamon sugar, leaving a gap about 1cm (½inch) along one long edge (see photo below). Roll the dough up, sealing along the edge without cinnamon sugar, press gently to seal. Cut the cylinder into 2cm (¾inch) slices and lay each one in a cupcake case. Add to the baking sheet. Keep the spare cinnamon sugar.
- Prove the pastries by putting the baking sheets in a cold oven and placing a bowl of boiling water at the bottom – if you can switch the oven light on as well (but no heat). Prove for 30-45 minutes till doubled in size. Alternatively cover the trays with a proving bag and place in a warm place.
- Once proved, remove the trays form the oven and switch it to heat to 210C fan / 220C non-fan. If your oven has a quick heat feature, switch it on.
- While the oven is heating, egg wash the top of the croissants and pain au chocolat. Take care not to get egg wash on the cut edges of the dough as it will impede the pastries flakiness. To help with this, I use an icing decorating brush rather than a pastry brush on the croissants. Add a second coat of egg wash after about 5 minutes.
- Once the oven has reached temperature, bake the pastries for 18 minutes till well browned.
- Remove from the oven and place the croissants and pain au chocolat on a cooling rack. Remove the cinnamon buns from their cupcake case and while still hot dip their tops on the spare cinnamon sugar. Place on the cooling rack.
- Allow to cool for 10-15 minutes, but they really are best enjoyed warm with a cup of coffee or hot chocolate!
 |  |
 |  |
 | |
 |  |


Tips
- Like puff pastry choosing the right butter really helps with lamination and you should aim for a higher quality butter. I like to use President or Yeo Valley unsalted butter.
- Aim for a dark chocolate that is about 40-55% cocoa solids. I find Guittard semi sweet chocolate chips work well but also readily available chocolate like Cadbury’s Bournville or supermarket own brand dark chocolate are also good.